Last Updated on October 16, 2023 by Chris and Lindsay
Not sure why it’s important or how to level an RV? In this post, we’ll share everything you need to know about leveling every kind of RV!
If you are new to the RV lifestyle you may not understand why it is important to level your RV when you park for longer periods of time. Of course, comfort plays a role. It’s not enjoyable to sleep on an incline. And cooking on your stove can be terribly inconvenient if you’re off-level.
But there are other reasons why you should know how to level an RV and we’ll cover those now, along with some tips and tricks for becoming an expert at the leveling process!
Affiliate Disclaimer: This post may contain links to products we think you’ll like. If you purchase any of the products through the links below we’ll receive a small commission. As full-time RVers, we know our RV products well and only recommend those that we either own or would consider owning ourselves.
How To Level An RV – Tools, Tips and Tricks to Leveling Your RV
One of the last things you want to do after driving all day is to pull into your campsite only to find that you are not level. In fact, this is one of the most stressful processes, especially when combined with having to back into a campsite.
But understanding why it is important to level your RV, and knowing whether or not you must pay too much attention to being perfectly level, will give you all the motivation to ensure your motorhome, travel trailer or camper is as level as possible.
GENERAL RV LEVELING PRINCIPLES
Regardless of which type of RV or travel trailer you own, these general principles will help you level your RV the first time.
| * Try to park as level left to right first | * Always have the rear higher than the front |
| * Use a bubble level to determine level | * Have a variety of leveling blocks |
| * Use your refrigerator as the point of reference | * Aim for less than 3 degree front to back & 6 degrees left to right |
Why is leveling important?
Leveling your RV is about more than comfort and convenience. It can be costly, particularly to your RV refrigerator, to develop a bad habit of not having your rig level when you part for extended periods of time.
And while the damage may be minimal and unnoticeable at first, over time if you do not have a level RV it can do substantial damage that will require an expensive and time-consuming repair or replacement.
Standard RV refrigerators are typically either 2-way or 3-way absorption fridges. What this means is that they can operate on one of 2 or 3 different power sources: 110V electricity, 12V electricity and LP gas.
And with an absorption refrigerator, as opposed to a compressor refrigerator, heat is removed from the freezer and refrigerator through gas exchange in the cooling unit of the fridge.
In simple terms, a cooling liquid (typically ammonia and water) is heated. It then rises and runs through a series of metal coils behind the freezer and fridge. As it cools, heat is absorbed from the freezer and fridge and is carried through the coils to where it can be discharged.
If you are not properly level, the cooling fluid will become obstructed and this process will be interfered with to the point you will cause damage to the cooling unit. This is one of the most common and costly repairs in RV life and one that can be avoided by keeping your RV level.
READ NEXT: Check out our post on how to repair or replace your RV Fridge after not parking level for too long!
How Level Do I Need To Be?
At some campsites, you could spend hours trying to make yourself perfectly level. However, you don’t necessarily need to be exactly level.
In fact, there is some leniency between the two directions in which you can have a mostly level RV and still sleep soundly at night knowing that your fridge has its proper function without risk of being damaged.
Leveling front to back is more important than being level side to side. However, do know that we are talking about a few degrees – not a substantial difference. At most, you will want to aim for no more than 3 degrees off level front to back.
When it comes to being level side to side, you will have a margin of error of 6 degrees before you risk damaging your refrigerator.
Of course, if you do not have an absorption propane fridge then leveling an RV or travel trailer is not as important as if you have a standard RV refrigerator. At this point, it will just be a matter of comfort.
Tools and Equipment To Manually Level Your RV – Motorized and Towable RV
You don’t need much to level your RV. However, having the right tools and equipment will make leveling a whole lot easier. Here are the basics.
Bubble Level

You don’t need this exact bubble level, per se. But you do need A bubble level to help you determine how level you are when you park for the night. Once you determine how level you are you can throw this one out and use RV bubble levels that you mount inside your RV.
Alternatively, you may want to have one of these bubble levels to mount on or in your RV.

These bubble levels are meant to be mounted in or outside your RV. Read on for a great trick about mounting them inside the driver’s side of the RV. If you don’t choose this one, be sure to get one that shows between 3-6 degrees as this is an important range when leveling your RV.
Leveling Blocks

These leveling blocks are RV essentials you must have. We like this brand because they are stackable, don’t take up much space and are quite durable. Whichever kind you choose, don’t hit the road without them!
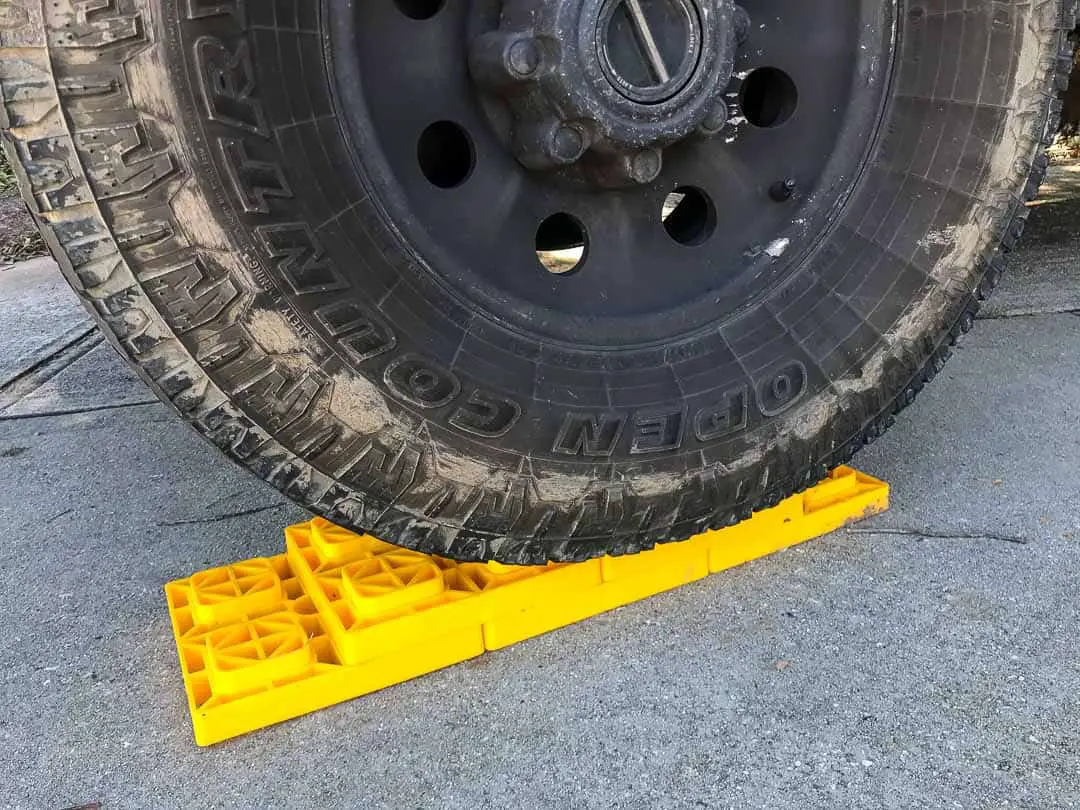
Alternatively, you may find these more suitable for leveling your RV

Although these leveling blocks may seem a little awkward at first, you may find that they are more precise and take far less time than having to check and re-check your level over time. Simply roll up on them as far as you need to be level and they’ll do the trick for you!
Or you can simply opt for 2″ x 6″ wood boards cut to 16″.
Wheel Chocks (Suggested for Towable RVs Only)

Motorhomes and other drivable RVs don’t necessarily need these chocks as the parking brake will usually hold well enough. But any towable RV should have a set of these to use any time you unhitch the trailer, whether leveling or not.
Stabilizer Jack Pads (Suggested for Towable RVs Only)

If you have either motorized or manual leveling jacks, these pads will work great for distributing the weight of your trailer as you level. Some people use their leveling blocks as jack pads. But we like these because they are entirely flat so you have solid contact between the jack and the pad.
How To Manually Level Your Drivable Motorhome
If you do not have an auto leveling system for your motorhome or drivable RV, these are the steps we suggest to help to manually level your RV.
Note, we have specific tips and tricks listed below that we’ll reference and encourage you to look at to help you become a pro at leveling!
- Pull into your campsite and try to be as level as you can side to side. Keep the front of the RV on the downhill side. It is easier to come up on one or two blocks in the front or rear than to try to adjust every wheel.
- If you have dual rear wheels, try to park in such a way that only your rear wheels are higher than the front. You will need to use twice as many blocks to level the rear wheels than the front wheels so it is easier to simply raise the front if necessary. Additionally, the parking brake holds the rear wheels in place so it can be dangerous if you have to raise the rear wheels.
- Check your bubble level. Because your refrigerator is the most important thing to be level, use the center of the refrigerator to gauge how level you are. (See Tip #1 below for how to accurately use a bubble level).
- If you are level left to right,
- Add a block to the front, pull forward and check if you are level.
- If not, reverse and add an additional block
- Try not to use more than 2-3 blocks on the front.
- If you are not level left to right nor front to back,
- Add a block to the low corners to raise the entire RV and check if you are level
- If not, reverse and add an additional block
- Once level, remember to set the parking brake. If you have wheel chocks or an additional block left you can place it in front of the rear wheel as added safety
How To Manually Level Your Travel Trailer
Manually leveling your travel trailer or fifth wheel is quite similar to the process of leveling a drivable RV.
- Try to park as level left to right as possible. You will be able to use your tongue jack or fifth wheel’s landing jack to fine tune the front to back level later.
- Check your level using a bubble level. Use the center of your refrigerator as your reference point (See Tip #1 below).
- If you are not level left to right, estimate how many blocks you need to pull up on to become level. You may pull forward or back up onto the blocks depending on the site. Check your level.
- Once you are level left to right, chock your trailer tires. Be sure to put one chock in front and behind of the tires on the side of the trailer that was NOT lifted.
- After chocking the wheels, unhitch the trailer. Then check your level from front to back.
- Place a stabilizer jack pack or unused block beneath the leveling jacks (either fifth wheel’s landing jack or tongue jack for travel trailer). Then raise or lower the leveling jacks accordingly until your trailer is level.
- Next, lower or place front and/or rear stabilizers in place. Ensure that there is equal pressure on each of them.
How To Level Your RV With An Auto Leveling System
Most newer trailers and fifth wheels and almost all Class A motorhomes have a hydraulic leveling system that will help automate the leveling process. Still, the principles of leveling are virtually the same.
- Try to park as level as possible left to right with the low side facing front.
- Place stabilizer jack pads, foot pads or spare blocks beneath each of the jacks. Ensure that the jack pad is as flat and secure as possible as it will help distribute the weight beneath it.
- Each auto leveling system is different, but most have controls that will tell you which corners of your RV are low. Press the corresponding button accordingly and adjust the level of your RV.
Tips and Tricks For Leveling Your RV
Trying to manually level a motorhome can be quite a challenge. And while newer RVs, travel trailers and motorhomes are starting to come equipped with an auto-leveling system, understanding the best practices for being able to manually level your rig will help you in the most challenging of situations.
Even if you have an auto-leveling system for your travel trailer or motorhome, there will be situations where your campsite may be so uneven that the leveling system may have a difficult time.
These are a few tips and tricks we suggest you use the next time you need to level your travel trailer or motorhome.
1. Use a Bubble Level
Auto leveling systems bypass the need for a bubble level in most circumstances. However, having a bubble level that shows how level you are from front to back and one that shows your level from side to side.
Some RVs come with levels attached to the side and back of the RV – either from the dealer/manufacturer or a previous owner. These can be ideal if you trust that the RV was level before the bubble level was attached.
However, in remodeling our Class C RV we found many instances where it was clear that the manufacturer did not concern themselves with whether or not the motorhome was level before installing items inside. For this reason, we use the following trick to help us level our motorhome every single time we pull over to camp for the night.
A) Park as level as you feel you can be. When you are fairly level, take a portable bubble level and open your refrigerator. Place the level in the bottom center of the fridge and check how level you are front to back and side to side. You can adjust your parking and check the bubble level again until you find that you are perfectly level inside the refrigerator.
PRO TIP: Why check your level with the refrigerator and not the floor or counter? Because this is an expensive appliance you are trying not to break by parking as level as you can! You only need to have the refrigerator level to protect it. But you’ll find that everything else should be mostly level with the fridge.
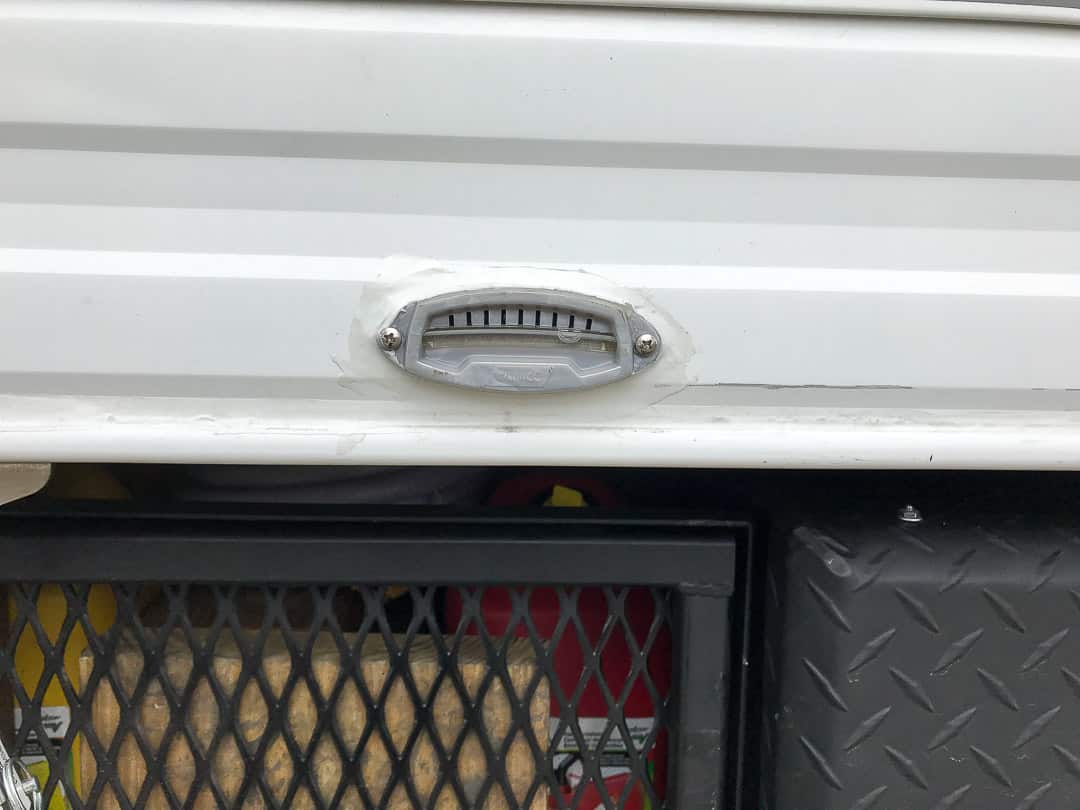
B). Once you are perfectly level, consider mounting two bubble levels on the driver’s side of the RV. Mount one showing the front-to-back level and the other showing the side-to-side level. Note: This process won’t work if you have a 5th wheel or travel trailer.
PRO TIP: Why mount these on the driver’s side of the RV? Because then the driver can check how level the RV is without having to get out of the vehicle. We can’t tell you the amount of time (and stress!) we’ve saved by having our bubble levels mounted inside the driver’s area of the motorhome.
2. Have a variety of leveling blocks to use.
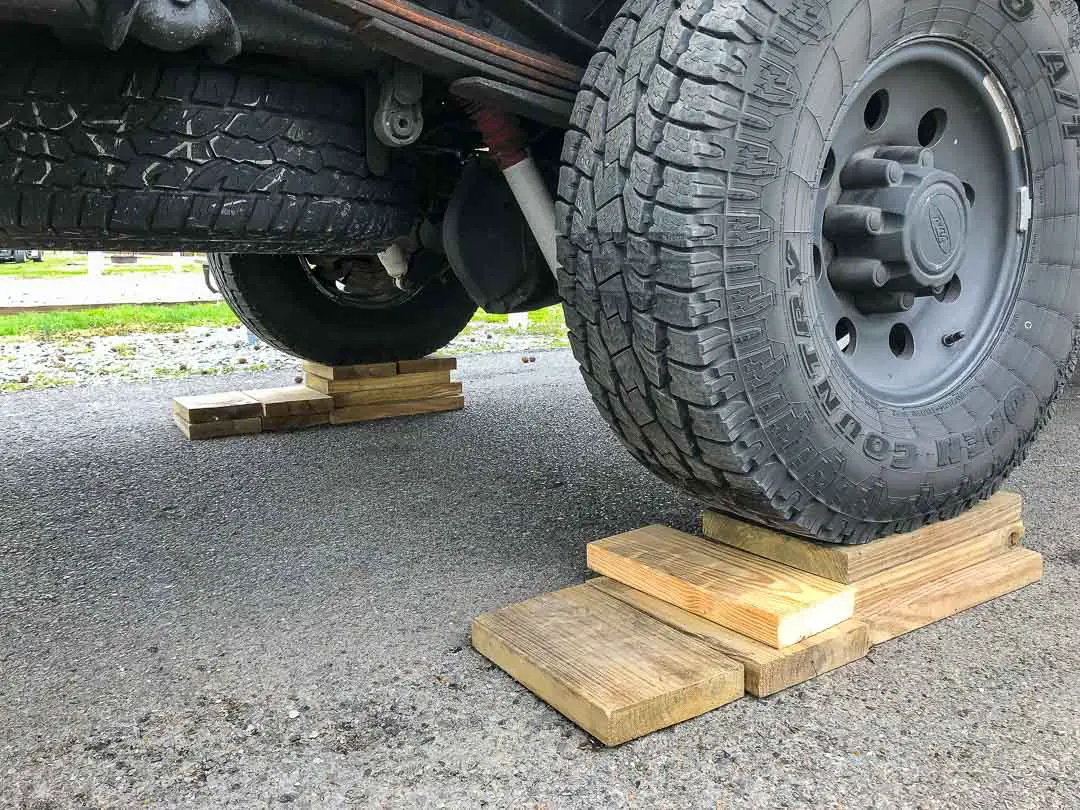
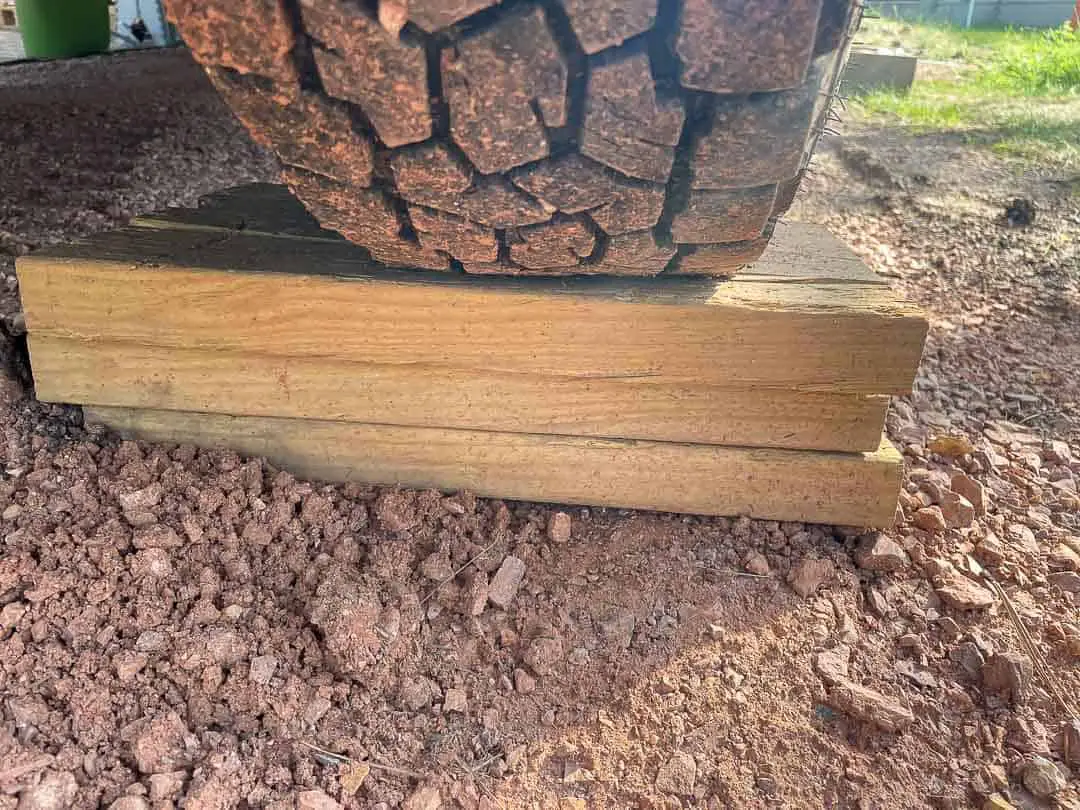
Of course, we have a set of standard RV leveling blocks like these. We recommend that everyone keep a set of these around. However, we also made our own blocks out of 2×6 wood.
We cut the wood to be 32″ long and then screwed a 16″ board on top. Our tires are around 14″ wide when parked so this is plenty of space for us to pull onto. Sometimes we only need to come up one level.
Other times we may need to come up two blocks. But these boards tend to handle hard terrain better than the standard blocks.
PRO TIP: Why use solid wood leveling blocks? The standard RV leveling blocks are great for stacking like Legos. However, when you’re pulling several tons of weight up on them, particularly in challenging terrains like hard soil or gravel, these tend to crack and break. We know we’re not the only ones who have had trouble with them in the past as we’ve come across numerous campsites where there were little yellow shards of plastic everywhere.
3. Place leveling blocks on the low corner of your RV.
When you first park and check how level you are, you may realize that you need to really focus on one corner of your RV.
In other words, you may not have to place leveling blocks beneath both front wheels or both back wheels. You may only need to place blocks on the low corner, such as the front driver’s side or passenger’s side.
PRO TIP: Why focus on just one corner of the RV? We have found that even if our bubble level tells us that we are low on the right wheels and front wheels, if we try to fix both orientations at the same time we end up in nearly the same place. Rather than try and raise one side and then the front/back separately, focusing on just one corner will often do the trick by leveling the whole RV at once. This saves time, frustration and usually requires a fewer number of leveling blocks.
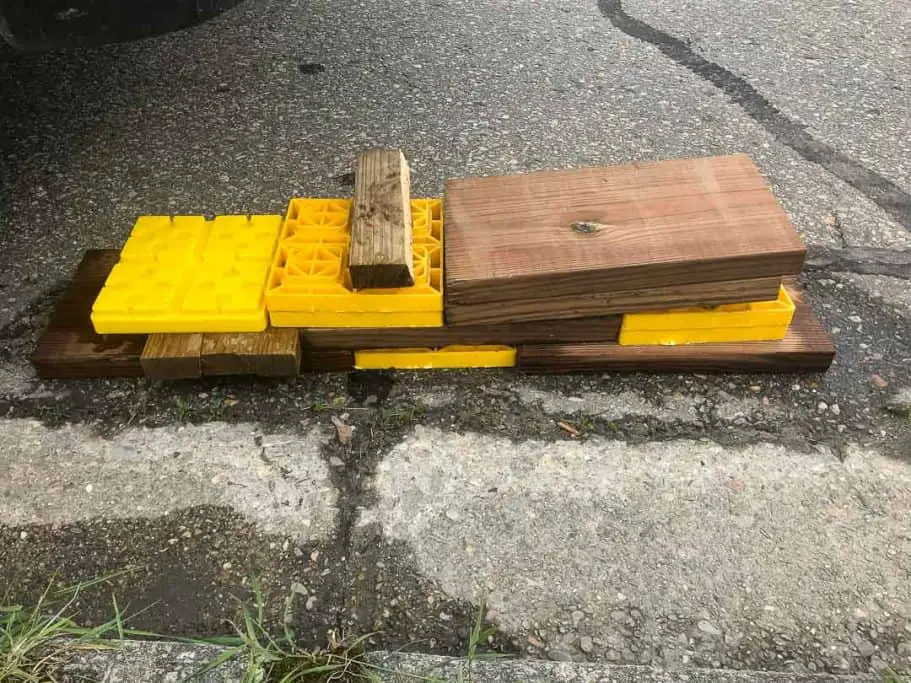
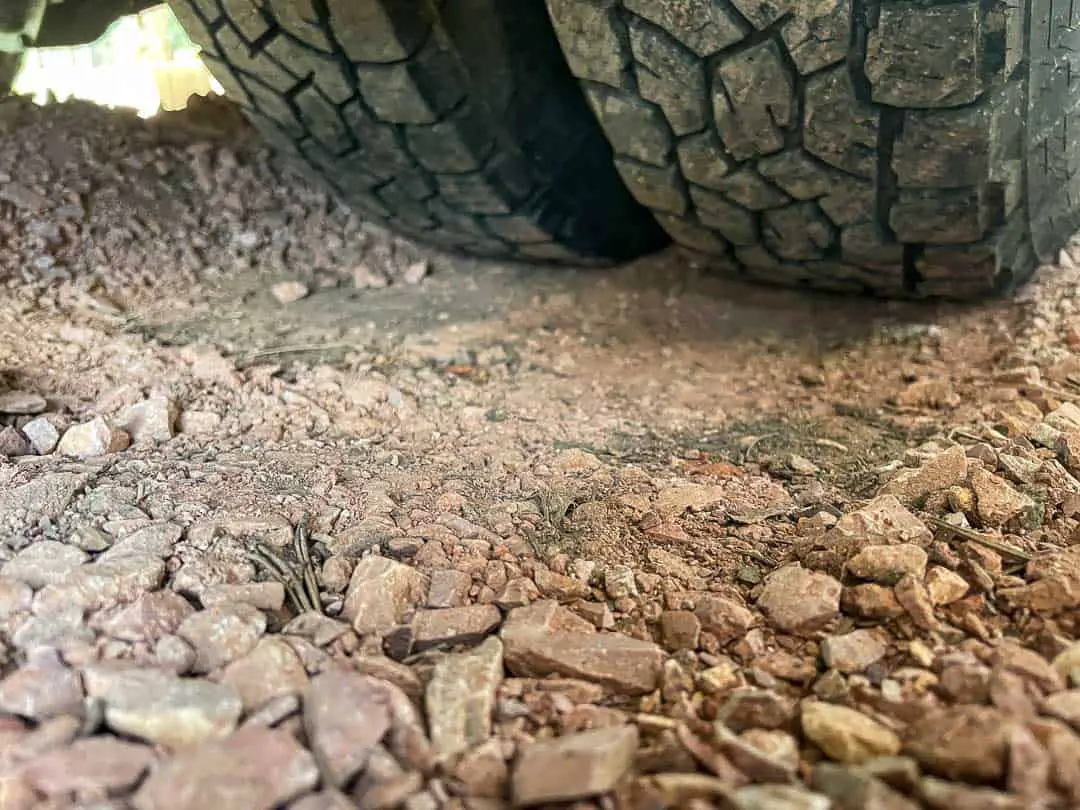
4. Use jack pads or solid wood in soft ground such as dirt or gravel.
Soft ground can be both a best friend and the worst enemy when leveling your RV. Just the weight of your RV or travel trailer itself can be enough to push down the soft ground over time.
To counter this, think about the snowshoe principle of distributing weight over a broad area. If you have stabilizing jacks, such as with a truck camper, or a tongue jack with your travel trailer, be sure to add a solid block of wood beneath the jack.
This will distribute the weight of the camper or travel trailer such that it does not sink into the ground as much.
PRO TIP: As with #3, we always have spare wood leveling blocks that we can use either to adjust the level of the RV or to use for purposes like this. We’ve camped in many places where rain has come and softened the ground even moreso than when we first arrived. So solid blocks of wood can help mitigate how much shifting your leveling blocks do.
5. Try digging a hole if you run out of blocks.
Sometimes the campsite is so unlevel that you will struggle with any kind of leveling system to determine how many blocks you need to level your RV.
There have been numerous occasions when we have used up the last of our leveling blocks, sometimes with up to five blocks on one side, and we realized that instead of trying to raise one set of wheels we should focus instead on lowering a different set.
This trick works well in soft sand, such as when you are beach camping. However, you can also use the opposite method and prop up your rear wheels or front wheels by pulling forward onto a raised area at the campsite. This may be a mound or collection of larger rocks that will act as a leveling block as you level your RV.
PRO TIP: Among other important RV must-haves, a small shovel works wonders for helping to level in difficult places. Dig out a small trench wide enough for your tires to sink down. Then set up your blocks as best you can and try fulling forward onto the blocks while the other tire(s) sinks into the hole. You should feel the camper come to a nearly level rest if you’ve done it right.
6. Don’t forget the parking brake and wheel chocks.
Once you are mostly level, or as level as you feel comfortable being, don’t forget to set your parking brake and/or use wheel chocks so that you do not roll from your position. This is particularly important if you find yourself lifted on several blocks while leveling.
Wheel chocks or blocks should be secured both in front and behind either of your rear wheels, if possible. This prevents you from rolling forward or backward on the blocks.
PRO TIP: Do not place the chocks on the rear wheel that is raised, if at all. Place the chocks on the wheel that is making contact with the ground. If you aren’t using chocks, remember the parking brake secures the rear brakes so it is not as effective or safe if you have to raise the rear wheels.
Wrapping Up
Parking level is important not only for your comfort, but more importantly to protect your absorption refrigerator. It is most important to be within 3 degrees of level front to back and 6 degrees of level side to side to prolong your RV fridge. Try and ensure that you are level left to right and that the front of the RV or trailer is on the downhill side so you can raise the front.
It will take you a little while to figure out how much to lift which wheels. But eventually, with enough practice, you’ll be able to look at your campsite and determine which wheel(s) to lift and how much!
Let us know if we missed any tips or tricks to help other people level their RVs!
Fantastic overview – as someone who’s about to buy their first RV, I’m grateful for your thorough write-up on something I knew I needed to learn!
Glad you found it helpful! Enjoy your upcoming adventure with your first RV! The lifestyle is so amazing and addictive!