Last Updated on December 9, 2021 by Chris and Lindsay
Truck campers are the perfect RV for exploring both the more common parts of the world as well as getting off the beaten road to experience more of the road less traveled.
We have taken our flatbed truck camper the entire length of the Dalton Highway in Alaska, on numerous off-road adventures throughout the United States and all throughout Baja, Mexico.
So we can definitively say that a truck camper is the perfect combination of mobility, durability and, of course, the convenience of home that you expect in an RV.
If you just bought a truck camper, or are considering purchasing one, you may be wondering how to load a truck camper onto your pickup truck.
It is simple. And complex. But really it’s just a matter of following a few steps that will become common and routine after you practice a few times.
Affiliate Disclaimer: This post may contain links to products we think you’ll like. If you purchase any of the products through the links below we’ll receive a small commission. As full-time RVers, we know our RV products well and only recommend those that we either own or would consider owning ourselves.
How to Load A Truck Camper
Loading and unloading a truck camper can be stressful (particularly on a relationship between you and your significant other!). And while it seems common sense, we did struggle the first few times that we loaded and unloaded our truck camper from the bed of our pickup truck.
But after nearly 3 years of living full-time in our truck camper we’ve boiled the process of how to load a truck camper into these simple steps:
Step 1) Switch your license plate from your truck to your camper.
This may not seem like a big, important step when loading your truck camper onto your pickup truck.
But if you forget this first, simple step then you will either find yourself pulled over at some point in your journey and/or you will have to crawl beneath your camper and remove the license plate from the truck after it is already loaded!
If you plan to take your truck camper on and off your truck frequently you may want to inquire with your local DMV whether you can have a duplicate tag for your camper.
Or, at the least, you will want to ensure your tag is easy to remove and install on both your truck and camper.

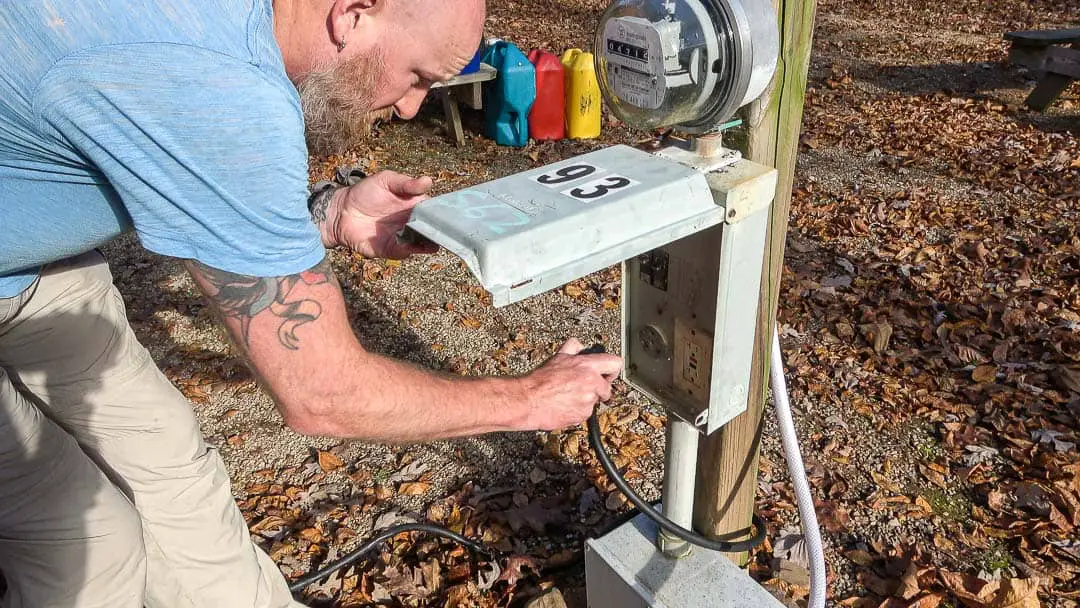
Step 2) Disconnect your camper from any connections.
When you are not using your truck camper it is common to have it plugged into shore power at your home or storage facility. Be sure to unplug this connection.
Likewise, if you are connected to city water and/or sewage be sure to disconnect these as well. While sewer and water connections will likely interfere with the loading/unloading process due to their locations, your power connection may not seem like an obvious disconnect option.
However, we disconnect our power for 2 important reasons.
First, our electric jacks are programmed to work from the battery only. 110v shore power actually interferes with the ability to operate our jacks (this may not be true for you).
Second, any maneuvering you may need to do with the truck and camper may tug on the electrical connection. You don’t want to be the person who rips out their power cord and/or damages the outlet (especially with an audience at a campground!).
Be sure to turn off any unnecessary appliances in this step, especially those that may run only on 110v (such as air conditioner, coffee makers, etc).
Step 3) Move any stowed gear and other obstructions beneath the camper.
When you unload a truck camper from the bed of the truck it is common to move any stowed gear beneath the camper. We do this with our generators, spare fuel containers, leveling blocks, bikes and all sorts of other miscellaneous gear.
Again, it should be common sense to move these. But the last thing you’re going to want to hear is the crunching or screeching of something that you forgot you set down (including any small tools and especially hardware like screws and nails!).
You will also want to tuck your electrical harness that connects the truck engine to the camper somewhere out of the way.
Note: in most truck camper setups this electrical harness is attached to the camper and plugs into the truck. But depending on your model you may have the harness attached to your truck instead. In this case, be sure to pull it snugly out of the way of where the camper will rest (in Step 5).
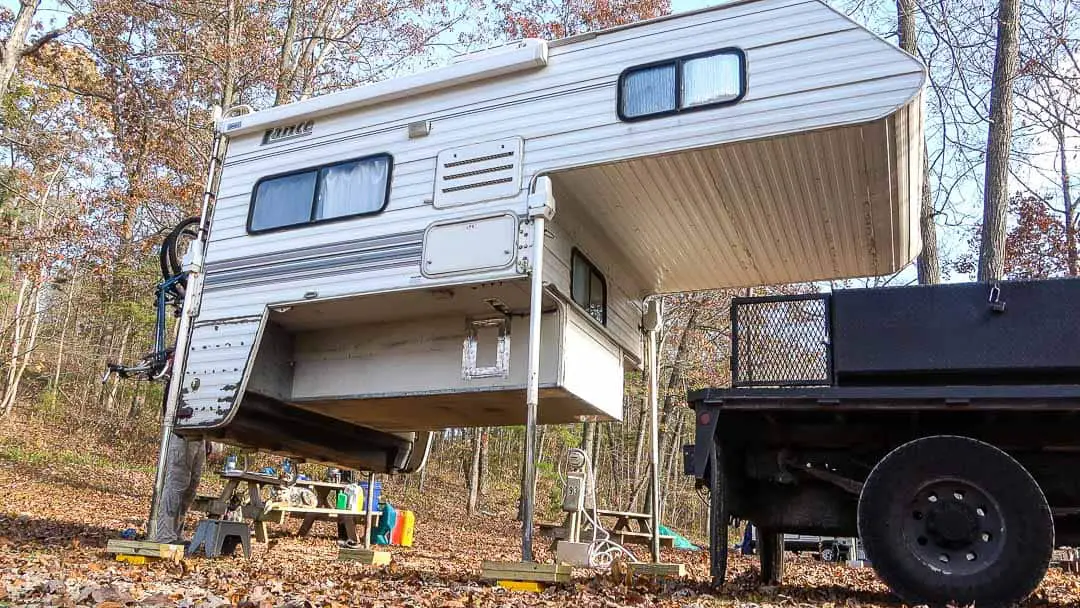
Step 4) Raise the truck camper on the jacks.
When we remove our truck camper from the bed of our truck we will lower the camper down to around 6-8 inches of clearance from the ground. This creates a stable foundation for our camper which has proven important on numerous occasions in particularly high wind.
If you do the same (which we advise) it is now time to reverse the process.
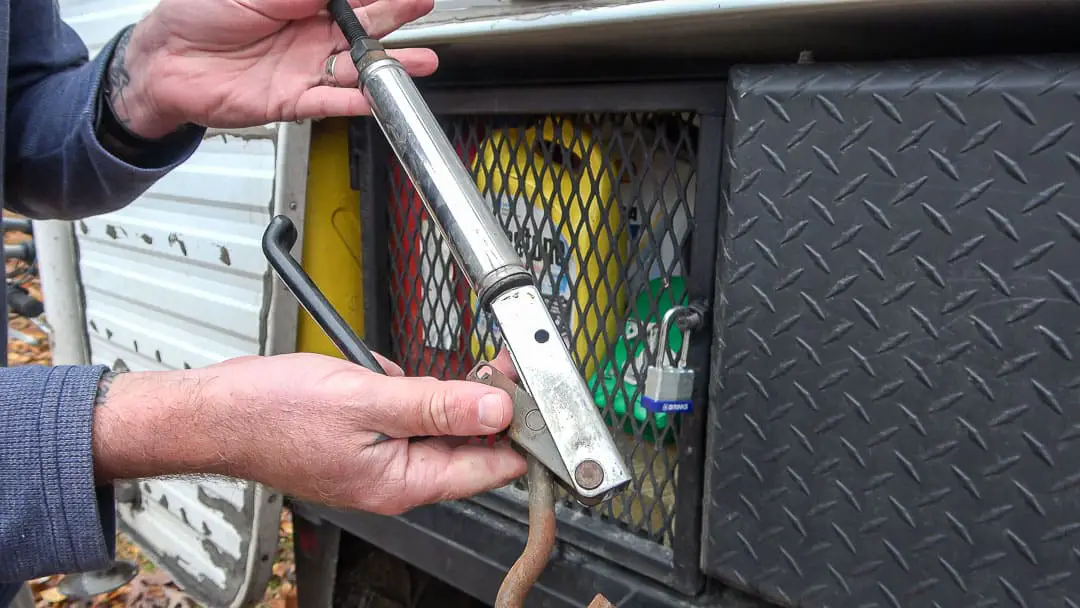
We have electric jacks that have a rocker switch to connect the jack motors to the battery-powered remote control. As a fail-safe, we also have a manual hand crank in the event one (or all) of the motors fails.
But you may have manual-only jacks that require you to hand-crank the camper to the appropriate height. In this case, we would advise that you invest in a second crank so you can have someone assist you in raising the level of the camper simultaneously from both sides.
We have also seen other truck campers invest in a drill adapter that allows them to speed up the process substantially.
Note: If you must manually crank your truck camper jacks be sure to only crank 6-8 rotations at a time before moving between jacks. If one jack becomes significantly higher or lower than the others it may buckle and break under the additional strain. If you have 2 hand cranks you will want to raise the two front jacks together and then switch to raise the 2 back jacks, and continue as necessary like this.
You will want to be sure to lift the camper well above where you expect it to slide into the truck bed. We find that sometimes we will have to lift the camper more as we slowly back the truck beneath the camper and realize a need to do so.
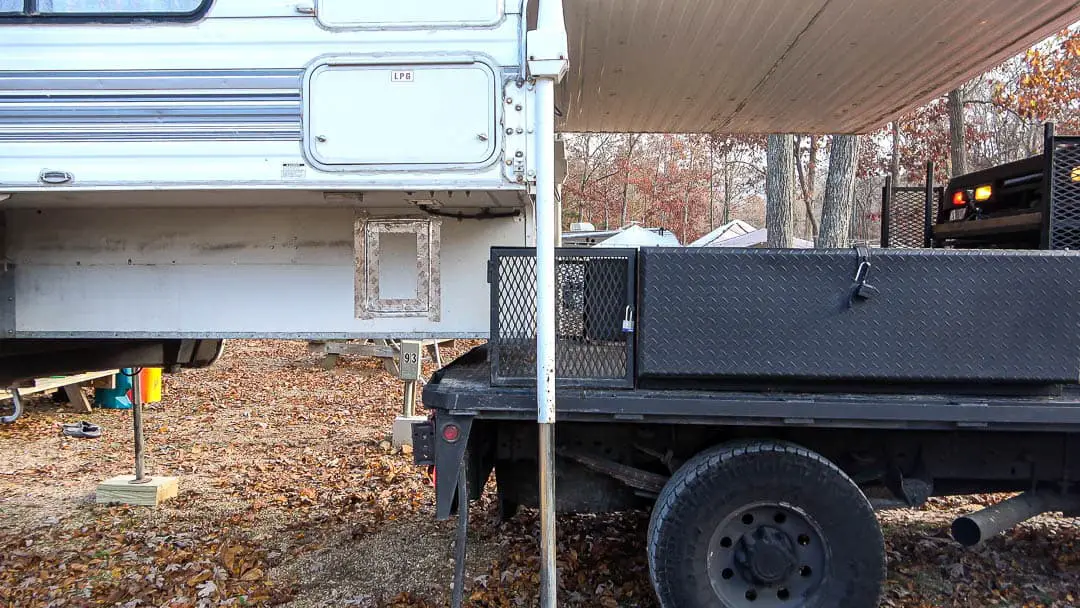
Step 5) Start your truck and back up straight beneath the camper.
This step is all about slow, straight and steady. Loading the truck camper is accomplished at the strategic point where you have the truck bed perfectly aligned beneath the camper.
As you back up be sure to check your clearance in both of your side-view mirrors. If you are loading your truck camper by yourself you will likely want to stop several times to check your progress.
It is best to keep the camper centered on your truck bed as best as possible. You may want to install markers (tape, paint strips or blocks) to line your camper on your truck bed. In our case, our flatbed storage box system pretty much lines our camper naturally.
But slow, steady attention to detail makes this (most stressful) step complete. Be sure that you are as snug as possible with how you orient the camper. When you attach the tie downs (Step 9) they will keep the camper secure in this position.
Note: If you have a standard bed you may or may not need to remove your tailgate prior to backing beneath your camper. This depends on the model of camper you have. With our flatbed truck camper setup we simply back beneath the camper until the tanks are in line with the very back of our flatbed.
Step 6) Lower the truck camper to the bed of the pickup truck
Once you are content that you have the camper aligned over the bed of your pickup truck you will want to raise (extend) the jacks so that the camper lowers onto the truck.
Typically one corner of the camper may make contact with the bed before the other. Monitor your jacks to ensure they are lowering at the same speed (if you have electronic jacks). Sometimes the motors will work at varying speeds.
As the camper approaches the truck bed try to raise individual jacks to make the camper as level as possible so that it lowers onto the bed uniformly.
Be sure to keep an eye on any place where the camper may make contact with the truck bed. Also, be sure that the electrical harness is pulled out of the way of the camper so that it is not crushed.
Once the camper is securely resting on the truck bed you can raise all jacks at the same rate. It may be a little unsettling at first to watch the truck begin to bear all of the weight of the camper. Truck your suspension to do its job, but do monitor that nothing looks out of the ordinary.
Note: If you have airbag suspension you may want to inflate it prior to the weight resting on the bed if you previously deflated it when the camper was unloaded from the truck.
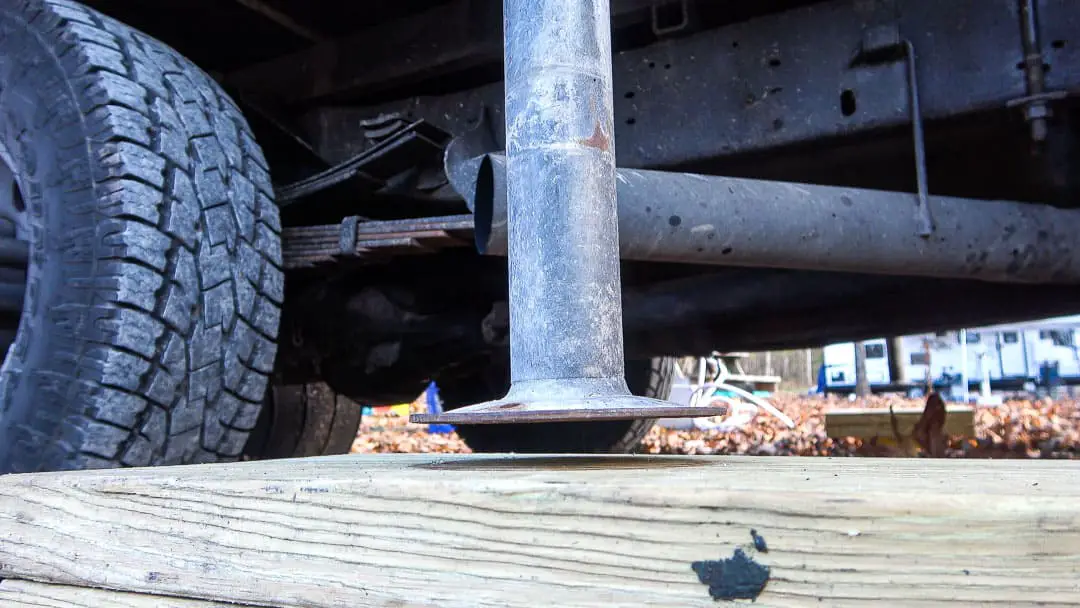
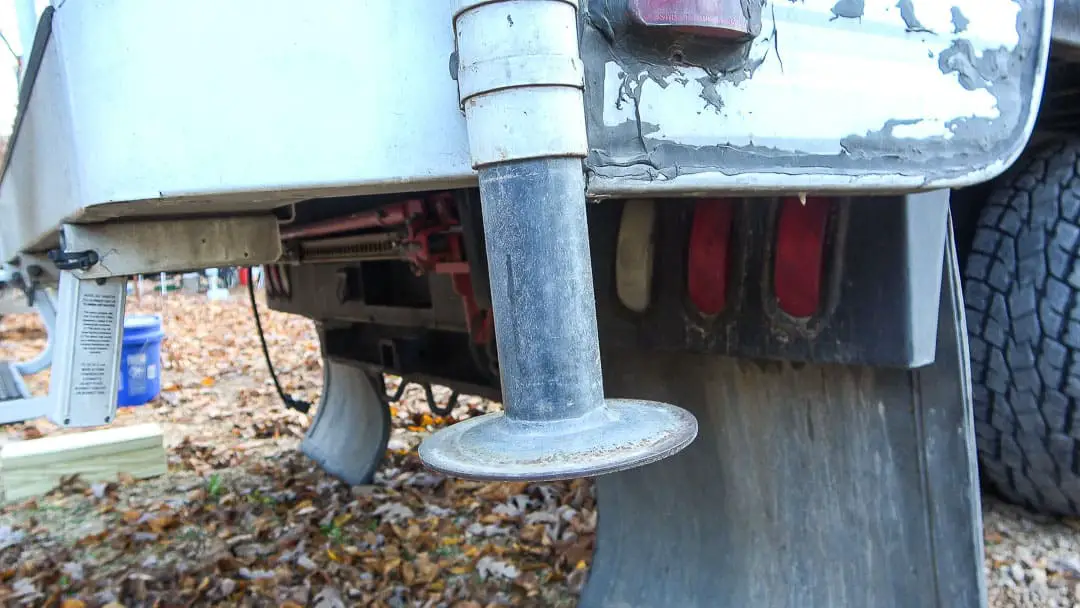
Be sure to raise the jacks until their footer is no more than 6-8 inches extended. This is particularly important for the rear jacks as they can catch the ground in low clearance areas if you do not have them retracted to a safe distance.
OUR TOP TRUCK CAMPER RESOURCES | |
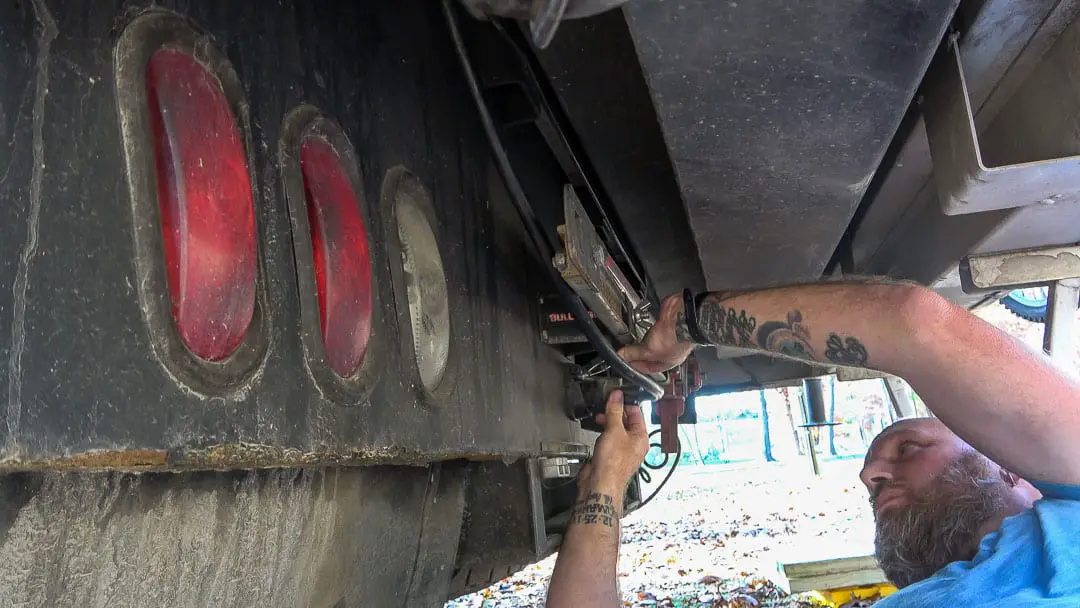
Step 7) Reconnect the electrical harness between the truck and camper.
This is a self-explanatory step to load a truck camper on a pickup truck. But if you forget to do this then you will not be sending your truck’s navigational signals to the camper.
Thus your brake lights and turn signals will not be indicated to vehicles behind you creating a dangerous (and illegal!) situation.
Because we do a fair amount of off-road driving we use zip ties to secure our electrical harness in such a way that it will not come unnoticeably undone.
Step 8) Secure the tie downs and turnbuckles between the truck and camper
This is the most important step in loading a truck camper onto a pickup truck. Tie downs are the points of contact on the truck to which you will attach the camper through the use of turnbuckles.
Turnbuckles can be steel rods that hook into the tie downs and screw together to tightly secure the camper. Or they may consist of metal chains that do the same when brought under tension between the truck and truck camper.
Securing the turnbuckles to the tie-downs keeps the camper positioned safely on the truck bed. Depending on your truck camper setup you may have frame-mounted tie downs that are secured to the truck frame itself.
Or, in our case of our custom flatbed truck camper, the bed itself is the tie down.
We use spring-loaded Happijac Qwik Load Turnbuckles as they are great for quickly securing (and disconnecting) the camper from the truck while maintaining the integrity of more rigid turnbuckles.
Another great quick-release turnbuckle you could use are Torklift FastGun turnbuckles.
Or you could go with the standard turnbuckles that you manually tighten.
Note: Each brand will have its own instructions for how much tension to create between the tie downs and turnbuckles.
Whichever turnbuckles you choose to secure your truck camper to your pickup truck bed, be sure to take the time to ensure they are secure.
You should have 4 points of contact that require turnbuckles – two in front and two in the rear. The front turnbuckles will typically pull the camper straight down or slightly forward. And the rear ones will do the same.
Note: You will want to make sure that at worst either the front or back set of turnbuckles is pulling the camper forward to ensure that it is secure and does not slide backward. This could cause issues due to steep grades and accelerations.

Step 9) Final check of all connections between your truck camper and bed
This is a simple, though arguably, most important step when learning how to load a truck camper onto a pickup truck.
The hard work and stress is done. But you do want to check all points of contact between your truck and camper to ensure they are secure and functional.
Since you just connected your turnbuckles in Step 8 this should be satisfactory. But do be sure that all turnbuckles are adequately tightened, especially if you have moved the truck and camper at all in between and the camper may have shifted positions.
But now you will also want to test your electrical harness connection between your truck and camper.
Be sure to check that when you use indicators in the truck they signal from the rear of the camper. This would include brake lights, reverse lights, turn signals and running lights.
Additionally, be sure that you have secured/removed any other items from around or beneath the truck and camper. This would include any leveling blocks you might have used beneath your camper as well as any tools you may have used to tighten your turnbuckles.
You are almost ready to pull away and start your adventure. Don’t ruin it by running over something important (and/or giving yourself a flat tire!).
Step 10) Inflate your tires and/or airbag suspension
If you deflate your tires once you unload your truck camper from your pickup truck (or if this is the first time loading a truck camper onto a pickup truck) you will want to make sure that you properly inflate your tires.
We inflate all of our tires to the maximum 80 psi rating recommended for our tires using an awesome Viair Portable Compressor. You may have more or less psi recommended based on your setup.
Note: Typically your front tires do not need to be fully inflated as they do not carry the weight that the rear tires do. Fully inflating them might make the steering wheel feel loose when driving. But we still inflate our front tires to 80 psi as well.
Also, if you have airbag suspension for your truck you will want to be sure to inflate the airbags as well according to the specs of your particular setup. We rarely inflate ours more than half of the airbag maximum rating of 100 psi.
But we do know that the driver’s side requires more air than our passenger side due to the unequal weight distribution of our camper.
That is all you need to do to load a truck camper onto a pickup truck! Now you are ready for adventure!

How to Unload A Truck Camper
While it may seem to be intuitive to unload a truck camper in reverse order, there are a few things we would point out to ensure the safe and efficient unloading of your truck camper.
Step 1) Try to park as level as possible.
While you can extend your jacks to varying lengths to account for unlevel ground, we try to park as level as possible before we unload our truck camper. This keeps us from overworking any one particular jack or distributing the weight unequally among the jacks.
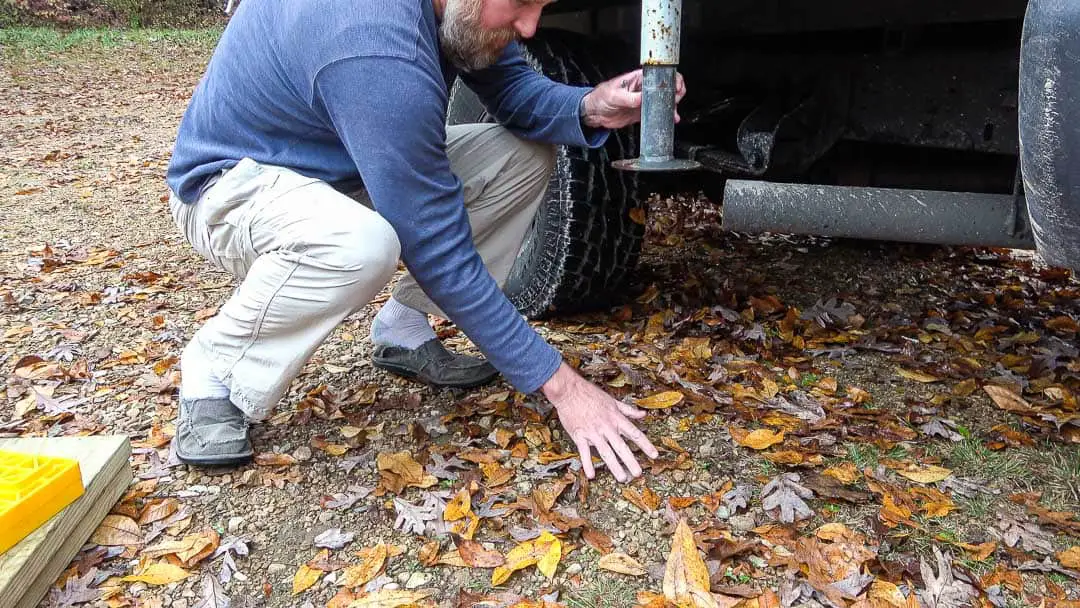
Step 2) Clear the ground beneath the jacks.
We will often sweep the area beneath each jack with our hands or a hand broom just to ensure that the ground is level. While the jacks will be supporting a fair amount of weight that will ultimately help the ground settle, you do want to try and clear the ground of any rocks or other debris that make the ground unlevel.
Note: We use our leveling blocks and wood board to support our jacks. This distributes the weight equally through all points in each jack. And it also lifts the camper several inches off the ground so we never have to rely on raising the jacks to their maximum.
Step 3) Remove the turnbuckles.
If you use Happijac Qwik Load or Torklift FastGun turnbuckles this should be as simple as removing a safety pin and releasing the handle. Disconnect the turnbuckles entirely from the camper.
We do not advise even letting them hang from the camper as they could interfere with the process of unloading the truck camper from your pickup.
Step 4) Unplug the electrical harness
This should be a fairly simple step in unloading your truck camper. But make sure it is disconnected and completely free of entanglement on any parts of the truck prior to pulling your truck away from your camper.
Failing to do this could cause significant damage to your truck and camper electrical components.
Step 5) Extend the jacks.
This will lower the jack toward the ground. If you are using eclectic jacks be sure to monitor the rate at which they lower. Sometimes motors operate at different speeds, especially if you have an older camper model.
Also if you are not on perfectly level ground keep an eye on when the jacks make contact with the ground (or leveling blocks). Ideally, you will want all 4 jacks to raise the camper at the same rate.
Raise the camper until it is completely hovering above the truck bed. You should be able to see all the way beneath the camper.
Note: If you are parked at an incline you may need to raise the front or back of the camper slightly more as you slowly move your truck forward (Step 6).
Step 6) Start your truck and slowly move forward
Slow, straight and steady again dictate this step. Keep an eye on the side-view mirrors to ensure the camper does not make contact with the truck as you proceed forward.
Pull forward until the truck is entirely out from underneath the camper (including the cab). In the final step, you will be lowering the camper and you do not want it to make contact with the truck now that it is unloaded!
Step 7) Lower the camper back toward the ground.
You will want to lower the camper to within 6-8 inches from the ground. This ensures stability so the camper will not shake as you move around it or in the event of strong winds.
That’s it! Be sure to stow your turnbuckles and any gear and tools you may have used.
Helpful Essentials for Loading and Unloading a Truck Camper
While not all of these recommendations are necessary for loading or unloading your truck camper, we find that they make it easier and more convenient for us.

Leveling blocks allow you to rest the camper several inches above the ground so that you do not max out your jack motors in the process of unloading your truck camper. We use these for loading and unloading our truck camper but also for leveling our truck camper whenever we park on uneven surfaces.

Happijac Qwik Load Turnbuckles make loading and unloading a truck camper very quick and easy. They are spring loaded and have a quick-release handle making it easy to tighten and loosen the turnbuckles. These are a game changer for us in terms of loading and unloading our truck camper.

Torklift FastGun Turnbuckles are an alternative to the Happijac Qwik Load Turnbuckles. While they are a little more expensive they are also of better quality. You will want to invest in 2 sets of these. One is for the front and the second is for the rear tie-downs.

Frame-Mounted Tie Downs will vary depending on your truck. But essentially they mount to the frame of your truck and then connect with your camper using the turnbuckles of your choice. Note you will need both a tie down system and a turnbuckle system to properly secure the truck camper to the truck bed.

A manual crank handle may be necessary depending on whether you have manual or electric jacks. But we advise you consider having a manual crank handle as a backup in the event your electric jacks ever fail. With a manual jack system, you will want 2 crank handles to make loading and unloading your truck camper easier.

A Crank Handle Drill Adapter will make life a whole lot easier if you must use a manual crank handle to raise and lower your truck camper jacks. Use this when you do not have the full weight of the camper on the jacks (when the camper is on the truck bed) and use the manual crank handle when you need the additional torque due to the weight of the camper.

A Viair Portable Compressor is considered essential gear for us. Whether inflating our truck tires, airbag suspension or even our bicycle tires, this compressor is handy and powerful. It clips into your truck battery for power and has a long hose to reach all of your tires and airbag suspension as necessary. We don’t ever drive without it – even if we have just unloaded our truck camper.
READ MORE: For more truck camper essentials be sure to check out this post.