
Last Updated on December 9, 2021 by Chris and Lindsay
In this AeroPress coffee maker review, we’ll give you 10 practical reasons why you should consider buying and using this fantastic travel coffee maker, especially if you live out of an RV or camper van.
But even if you live out of a backpack or are an occasional weekend camper, the AeroPress Coffee Maker is an ideal travel coffee maker option for many of the same reasons we’ll describe below.
We’ve owned our AeroPress coffee maker longer than we’ve owned an RV. That’s because coffee always has been (and likely always will be) the most important part of any day for us. So before we began traveling we wanted to make sure that we had the best coffee maker we could find for the journey ahead.
But as we made the decision in 2018 to live full time in our truck camper we realized that space is incredibly limited and power is not always guaranteed. As such we began our quest to find the perfect portable coffee maker.
That journey led us to discover some pretty decent options, as we review in this post. But when it came down to it, the AeroPress Coffee Maker was the best travel coffee maker for reasons we’ll explain below.
Many AeroPress coffee maker reviews are written by people with no true experience living with the amazing capabilities of the portable coffee maker. Not so for us.
Everything you’re about to read is 100% genuine and verified by a coffee addict who has taken his AeroPress Coffee Maker over 50,000 miles across the North American continent, serving up piping hot cups of coffee for his wife and himself from the remote wilderness north of the Arctic Circle to the relaxing seaside campsites along the Sea of Cortez in Baja, Mexico.
He’s even sipping a cup of delicious coffee from his AeroPress as he writes.
Affiliate Disclaimer: But do note that I do want you to purchase your AeroPress Coffee maker to revolutionize your travel coffee maker experience. If you happen to do so through any of the links provided in this AeroPress coffee review we will receive a small commission and be humbled that you trust us with the most sacred of your daily rituals.
AeroPress Coffee Maker Review: The Best Portable Coffee Maker for Travelers

While we had to put a number to each item in this AeroPress review there really aren’t too many reasons that trump each other.
So consider each of these points equally indicative of our love for our AeroPress coffee maker!
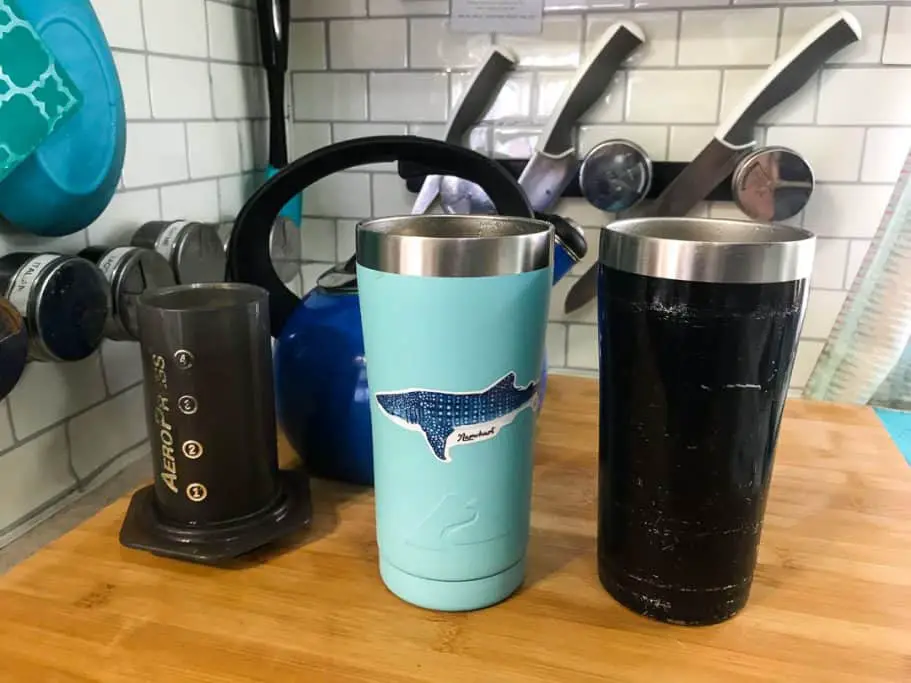
You can trust us to know what we’re talking about since our AeroPress is well-worn from hundreds of uses throughout the past few years of travel!
1) It is Compact.
For any full-time RVer or van lifer, space is a premium in your life. Anything you own must have a purpose. And the best RV accessories are those that serve a practical purpose to offset the space that they take up.
Coffee makers are clearly practical. But what is not practical is the amount of space traditional coffee makers take up.
As such, the AeroPress Coffee Maker is pretty much the smallest, most compact portable coffee maker on the market. It consists of 3 required parts that you can dedicate a space for in your kitchen.
Or you can simply shove it wherever you have room (we’ve done both in our years on the road!). If you opt for the latter, it’s incredibly durable and it won’t take it personally if you do!
2) It doesn’t require power.
OK, so this is partially true. It does require power to heat the water that you’ll pour into it. But you don’t have to plug it into an outlet directly.
This is particularly important for those of us who do live out of our RVs or vans where power is a limiting factor.
You will need to heat water to pour into your AeroPress coffee maker. But for us, this is as simple as an old school stovetop kettle we boil water over our propane stove the way our grandparents used to do. You can keep an electric kettle stashed away too if you’d like for the days you do have 110v power.
But in all honesty, being able to heat water over our stovetop or an open fire is an added benefit to this point in our AeroPress review.
3) It is durable.
We’ve never tried to intentionally break our AeroPress coffee maker. But the Dalton Highway has. So have the dirt roads of Baja and the occasional wildlife that has run across the road in front of us necessitating immediate braking.
And we can tell you that for the number of times we’ve dropped our precious portable coffee maker, it has literally bounced back every time.
The AeroPress coffee maker is manufactured with hardy BPA free plastic that makes it virtually indestructible.
Plus we’ve owned ours for over three years and poured piping hot water into it every day (at least once per day!). This means to date (and for the purpose of this AeroPress review) it has endured over 1,000 days of being subjected to boiling water and it shows absolutely no signs of slowing down.

4) It makes coffee relatively quickly.
If you are only making one cup of coffee you can pour your hot water into the AeroPress and let it work its magic with no ongoing maintenance and you’ll have a fresh cup of coffee usually within 2-3 minutes.
If you’re like us and need to make 2-3 cups you will need to pour water, do other morning routines for a few minutes, then return to pour more water into the AeroPress. But this whole process doesn’t take more than 5 minutes for 2 cups
(Note: my wife always gets the first cup while I wait for the second. This is good marital advice.)
During this time we just let our AeroPress do its thing while we work through other morning tasks.
Basically, gravity pulls water through the coffee grounds and filter to drip into your cup. Unless you’re planning to head into space, gravity operates at the same rate regardless of where you are so you can rely on its consistency as your timer.
5) It comes with a plunger to speed up the process.
Or, if you are the impatient kind, there is a plunger that you can use to accelerate the work of gravity. We try not to be impatient with our mornings so we don’t use the plunger frequently.
But every now and then we’re waking up early to capture sunrise photos and we don’t dare start the RV without coffee in our hands (it is a driving safety hazard!).
So plunge if you want to plunge. Or let gravity do all the work for you.
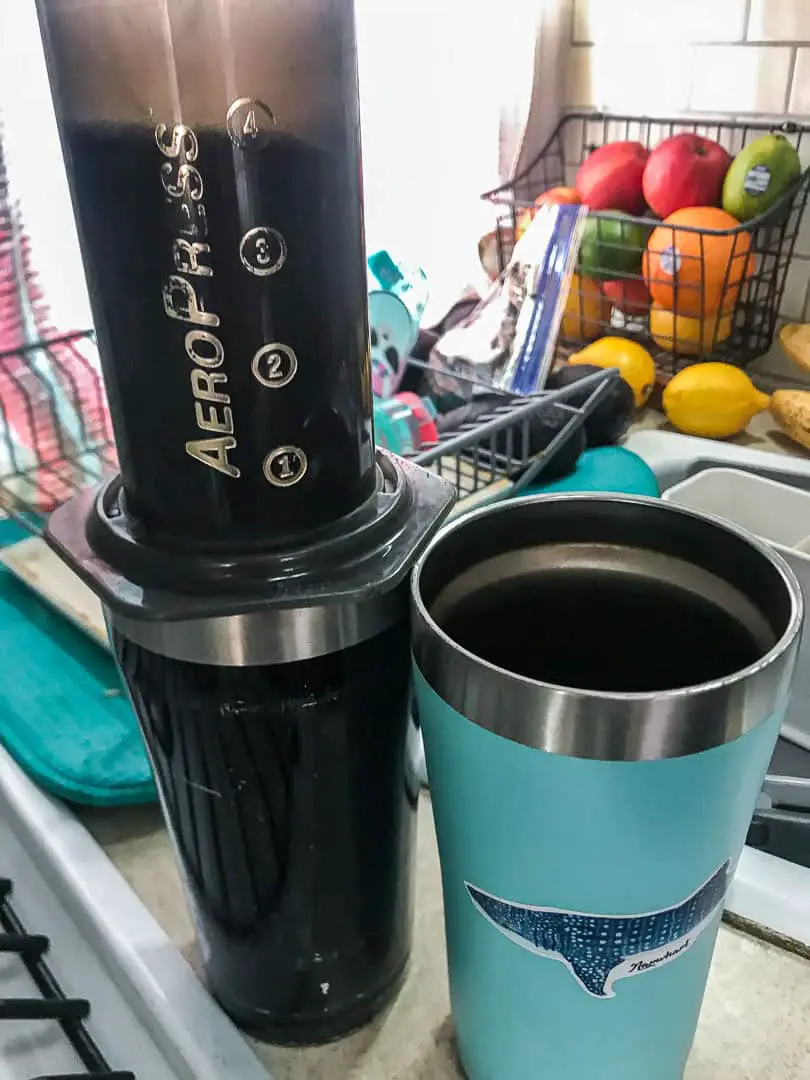
6) It makes 2 “cups” of coffee.
As of this very moment, there are active debates on the internet about what justifies a “cup of coffee.”
A fluid cup of any liquid is 8 oz. But a traditional coffee cup is considered to be 4 ounces. The smallest cup of coffee you can buy from Starbucks or Dunkin Donuts is twice the traditional view, at 8 oz.
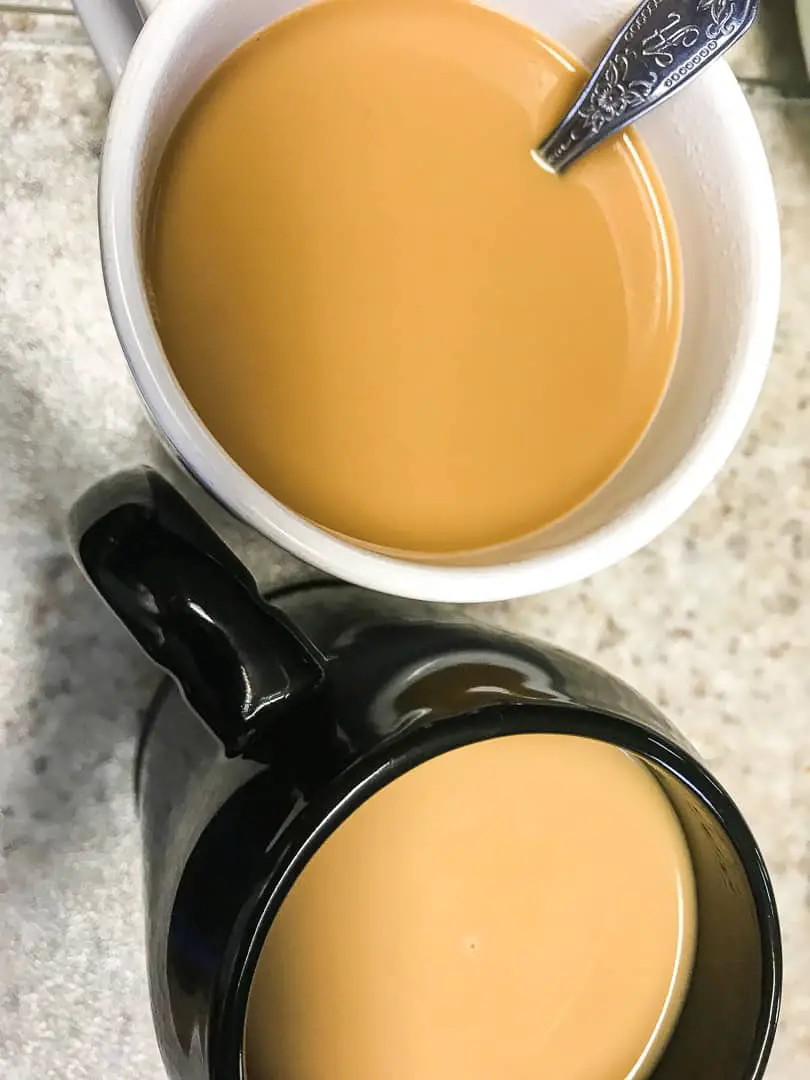
But who orders a “small” coffee anywhere? When we say our AeroPress Coffee maker is good for 2 cups we’re talking about 2 travels mugs that hold 20 ounces of piping hot coffee.
While how much coffee grounds you put into the AeroPress will vary by how strong you like your coffee and by how much you like to brew, we found that putting 2.5 heaping spoonfuls of coffee will equate to these precious 40 ounces of black coffee.
The last few drips are sometimes more water than coffee. But this typically balances out with the strong first drips.
There are also a number of AeroPress coffee recipes for how you can spice up your coffee (Note: this is NOT a bonus for us as we’re traditionalists in our coffee brewing). So your actual formula may vary.
But if you’re aiming for 1-2 solid cups of coffee the AeroPress will deliver for you day after day.
7) It makes less acidic coffee.
If you are not a fan of the acidity and bitterness found in many styles of brewing coffee you will be grateful for the quality of coffee your AeroPress makes. While the occasional AeroPress coffee review will compare the Aeropress to french press coffee makers, there is a substantial difference in the resulting taste of the coffee.
Because the coffee grounds seep on-demand as hot water flows through them inside the AeroPress there is no build-up of bitterness in the resulting coffee.
Of course, you can always cut your bitterness with cream and sugar. But I’m a purist and prefer black coffee and am never disappointed with my cup of AeroPress coffee.
8) It is super easy to clean.
If you’re like me, the worst part of any dining or drinking experience is cleaning up afterward. For me, dirty dishes in the sink take away from my pleasure in enjoying my meal.
When it comes to coffee, knowing that I had a mess to clean up after making coffee takes away from the joy of the cup. But I can clean up our AeroPress coffee maker in less than 30 seconds and with only a half paper towel and a few drops of water.
After the last drop of coffee hits the cup I’ll unscrew the filter cap and dump the grounds and filter into a waste bag. When the coffee is warm and moist it literally slips right out.
Then moistening a paper towel I’ll wide down the AeroPress chamber and the filter cap. We load up a new filter right there and stow the AeroPress coffee maker so it’s ready to brew the next round of coffee right out of the cabinet.
9) It has neat accessories.
The standard 350 filters that are included with your initial AeroPress will last most of a year and are ridiculously cheap to restock. But you can purchase a reusable filter to save even that ongoing expense.
And because AeroPress has become one of the most popular portable coffee makers there are many third-party manufacturers who have designed some nifty accessories to go along with it.
From creative space-saving storage mounts to double-pour brewing adaptations, there is pretty much nothing you can’t do with your AeroPress these days.
And if it wasn’t already portable and compact enough, AeroPress has recently come out with the AeroPress Go, which is essentially the coffee-making kit that fits neatly into its own mug.
10) It is incredibly affordable.
With AeroPress kits available between $30-$40 USD online and occasionally less at major big-box retailers, this is one of the most affordable portable coffee makers you can buy.
When you combine all of the other great reasons to buy an AeroPress coffee maker, its affordability puts it over the top. For the amount of space it takes up, it really packs a real punch.
So far our AeroPress has lasted over 3 years. So for $10 per year we’ve had delicious coffee on-demand everywhere that we have traveled.
We’ve opted to pass up on coffee from shops because we can brew our own coffee (and save some big bucks) in around the same time we wait in line in some instances (We’ve even brewed our own coffee while parked in a Starbucks parking lot!).
And if you’re worried about having to purchase replacement filters, these are ridiculously cheap too. You can get 700 of them for around $15 (that’s nearly 2 years of daily coffee for $0.02 per filter).
Overall, the AeroPress Coffee and Espresso Maker (don’t forget you can also press espresso!) is hands down our favorite travel coffee maker and the best value on the market. We use it even when we are spending time with friends and family in their brick-and-mortar homes and have the option for a traditional coffee maker. It has become a part of our daily life on the road and since it shows no signs of slowing down, we won’t need to consider replacing it for many more years to come!
How To Make Coffee With Your AeroPress Coffee And Espresso Maker
While the world has its fair share of “coffee snobs” who could find ways to overcomplicate the process of making coffee using an AeroPress, the reality is this is a very simple process.
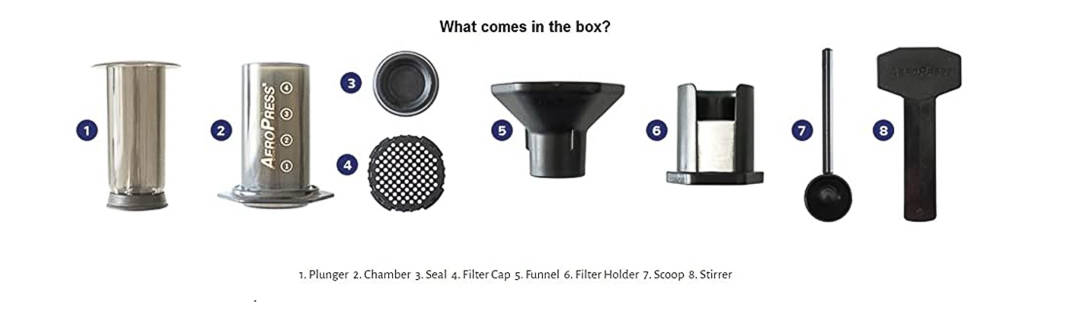
What comes with the AeroPress Coffee Maker
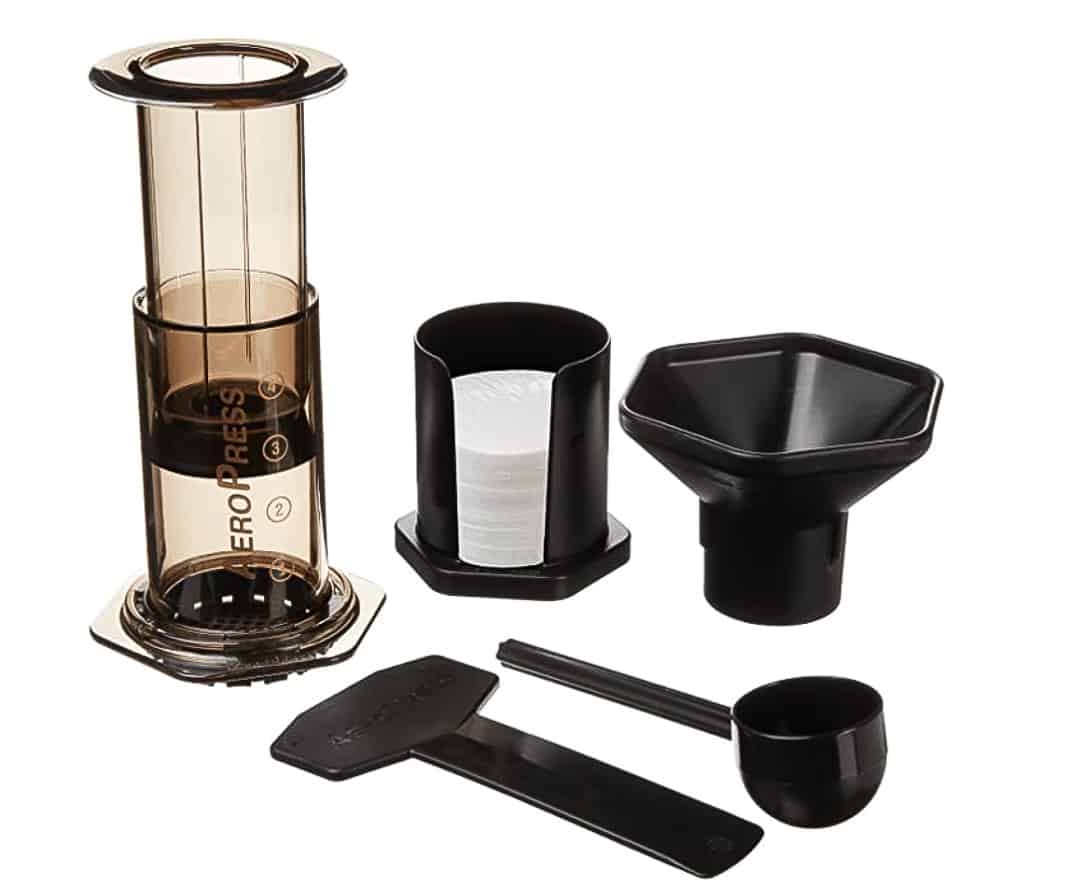
AeroPress technology is simple. The standard kit comes with 8 pieces. While each of these pieces serves the following functions we’ll show you how we only use 4 of them to make our coffee.
- Plunger – Allows you to help gravity by pushing water past the coffee grounds
- Chamber – The actual container that holds the coffee grounds and hot water
- Seal – Creates an airtight “vacuum” at the end of the plunger
- Filter Cap – Holds the filter and thus the coffee grounds inside the chamber
- Funnel – Helps keep you from making a mess pouring grounds into the chamber
- Filter Holder – Holds the spare filters for future use
- Scoop – Used to transport coffee grounds from your container to the chamber
- Stirrer – Can be used to create a more consistent cup of coffee
Now that you know the basics, know that you can toss out the funnel, filter holder, scoop and stirrer if space is limited.
You probably have a kitchen spoon you use regularly that can double for a scoop and stirrer. And you can stash the filters in a small ziplock bag to keep them from going everywhere if the filter holder ever falls over (and it will in a bouncy RV!).
If you need help transporting grounds from the coffee bag/container to the chamber this can help. But for us it got in the way.
STILL NOT CONVINCED? Read our post on the best Travel and RV coffee makers.
How To Make A Cup of Coffee Using the AeroPress Coffee Maker
Now that you have the parts figured out (and set aside) the process of making coffee is pretty simple. Read on for how we have learned to make coffee (and clean up) each morning for years.
Step 1: Heat up water.
We use our propane gas stovetop to heat water in a kettle. You may do the same or microwave water. However you heat your water, get it started because you’ll be all setup with your coffee maker before the coffee has time to boil.
Step 2: Filter.
We usually put the filter in after cleaning the day before. But this is a simple first step. Insert a clean filter into the filter cap and twist this into place into the chamber.
Step 3: Add coffee grounds
We use a standard kitchen spoon and scoop coffee grounds from a container to pour into the chamber. Note the amount of grounds you need varies on how strong you prefer your coffee.
Over time we’ve adjusted our “formula” to know by sight about how much coffee grounds we need to make the perfect cup or cups. Add as much or little as you want.
Step 4: Set the chamber on top of the coffee cup.
Your kettle likely isn’t whistling yet. So now you just set the AeroPress coffee maker chamber over your cup and wait. We take ½ of a sheet of paper towel to place beneath our cups.
This serves to both keep your kitchen clean but also to clean your AeroPress coffee maker.
Step 5: Pour hot water into the chamber
Once you have hot water you will pour it into the chamber and almost immediately hear the mouth-watering drip of coffee into the cup below. We pour slow such that the cup is partially full by the time we top off the chamber.
At this point, you can either use the plunger to force the hot water through the grounds and filter. Or you can let gravity work and take care of a few morning rituals while the chamber drips. If you use the plunger, note that you don’t have to push it all of the way down.
In fact, we will push it a little way down, then back it out and push it down a little more all over again. If you push it down all the way then when you try to retract it later it creates a “bubble” and “burps” grounds and hot coffee everywhere when the vacuum seal is broken.
Most of the time we will not use the plunger. Instead, we’ll check email, take the dogs out our start breakfast while we monitor the drip.
Note that if you are just making one cup then you likely won’t have to add any more water. But if you do want to make additional coffee you will need to monitor when to add more water to the chamber.
Also, know that the first drips of coffee will be the strongest and the last will be the weakest. With our 2-cup process, we rotate our cups beneath the chamber to ensure that both cups are about equally as strong. Note that if you
Step 6: Clean the AeroPress coffee maker
We like to clean our AeroPress coffee maker before we enjoy our coffee. It relaxes us to know that the kitchen is clean while we slowly sip our morning coffee. But also the chamber and filter cap are easier to clean when they are warm and moist.
When you are ready to dump the grounds hold the chamber over a waste container. Twist the filter cap to the left and the grounds will slide right out.
Note that if there is any water in the chamber that has yet to drip through the filter this will spill out and is HOT! So be sure the grounds look “dry” or else you may get hot water over you.
You can use your plunger at the last part of step 5 to push the water through.
Once the grounds are in the waste container you can wet the ½ sheet of paper towel and then wipe out the chamber and the cap.
Usually, our brewing is “clean” and there are few grounds clinging to either the chamber or the filter cap. We never have to run water over the AeroPress to clean it (so we never “waste” precious water in our RV).
Step 7: Insert a new filter and lock in place
We usually put a new filter in the filter cap and lock it into the chamber when we’re cleaning the AeroPress. This way we can pull it out of the cabinet and start this process at Step 3 the next time we want coffee (not always the next morning, sometimes later in the day!).
Step 8: Enjoy your coffee
Now that your coffee is made and the AeroPress is cleaned and put away you can add whatever sugar and cream you may want and sit down to enjoy your coffee!