Last Updated on August 21, 2022 by Chris and Lindsay
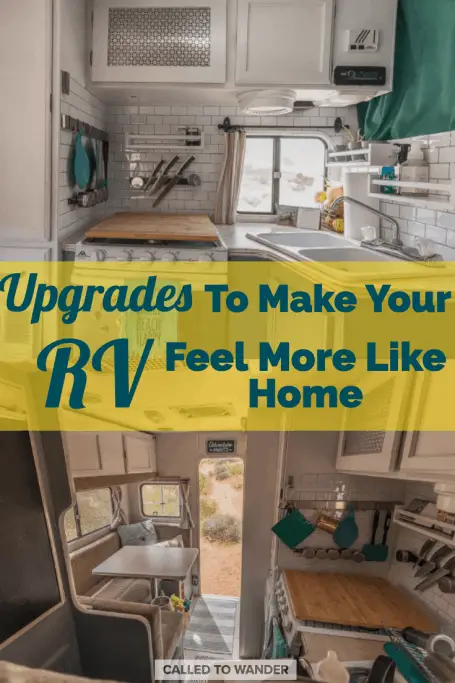
Learn some simple, affordable RV upgrades and tips that will turn your camper into your home!
Unless you get a brand new out-of-the-factory, custom-built RV it is likely you may want to make some RV modifications and upgrades to your camper.
When we purchased our 15-year-old truck camper we were not exactly sure what we had purchased. We were ambitious in our desire to drive from Alaska to Argentina.
But we had never been RV camping before – never mind owning an RV!
However, in our first year on the road, we learned many things that taught us how to RV. Among those things, we realized that as we were full-time RVing our camper truly was our home.
We knew that. But we settled on some aspects of our camper that made it feel even more like a moving hotel room than a home.
There were many parts of our camper that were still factory-issued and did not work well for us. Simple things – bland vinyl wallpaper, a screechy stovetop, an inefficient shower head and awkwardly shaped storage compartments.
Everything in the camper was certainly habitable. But it didn’t feel like home.
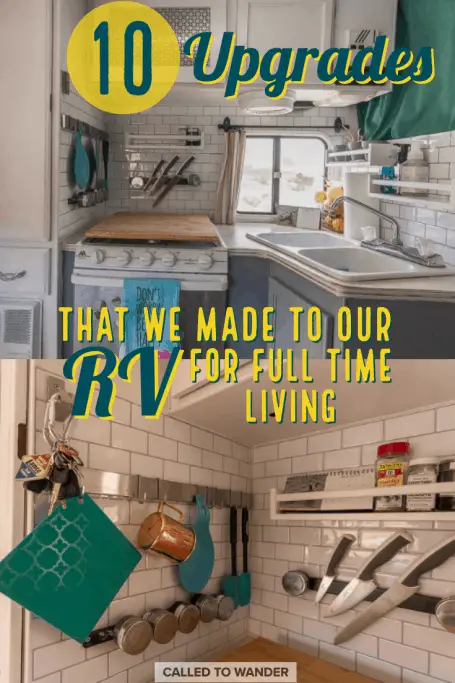
So at the end of our first year, we made the following upgrades and modifications to our camper and will share how simple and affordable they are for you to do as well!
Affiliate Disclaimer: This post may contain links to products we think you’ll like. If you purchase any of the products through the links below we’ll receive a small commission. As full-time RVers, we know our RV products well and only recommend those that we either own or would consider owning ourselves.
RV Modifications For The Kitchen
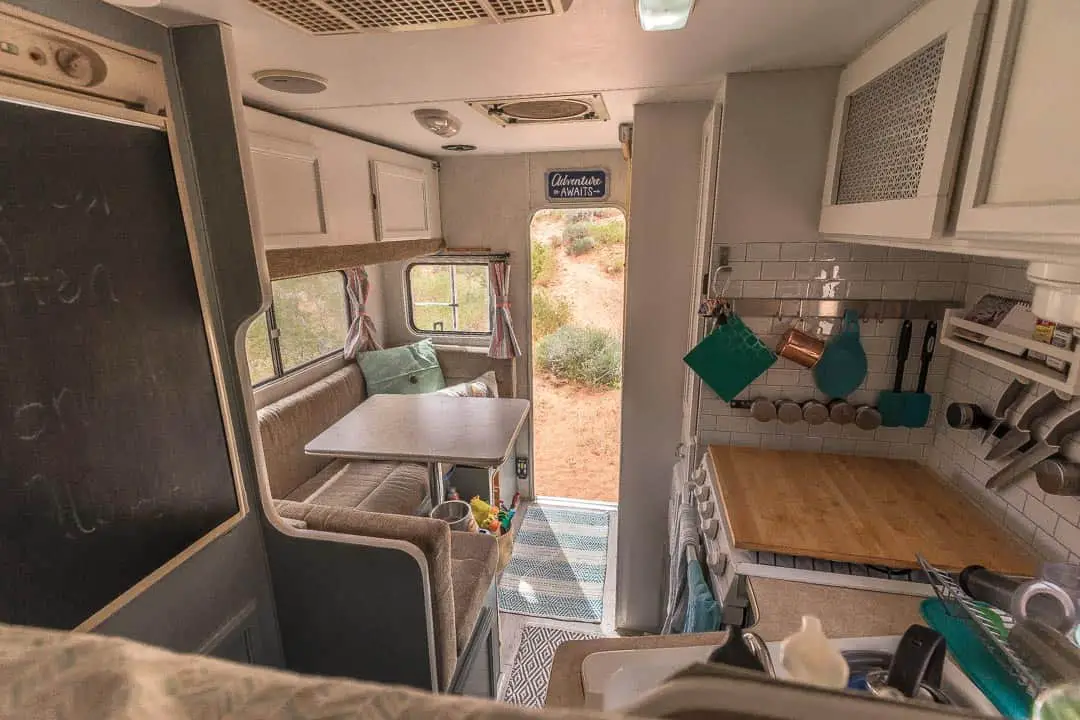
When you live in your camper full-time you realize how small your living area actually is. Whether you have a Class A motorhome or a van it seems as though you never have enough space. Everything becomes cluttered quite easily without proper organization.
For us, the kitchen was the focal point and most-used part in our camper. We knew this needed to be the first upgrade. By upgrading our kitchen first we knew we’d immediately get that sense we were seeking.
With that also came a functionality that optimized the area we had. We could do more with the same amount of room.
Here are our recommended upgrades and tips for the kitchen that helped us achieve that look and feel.
| Top Upgrades (described in sections below): * Tic Tac Tiles (kitchen backsplash) * Ikea bamboo cutting board * Kitchen Shelving (try this one from Ikea) * Stainless steel magnetic bars * Stainless steel magnetic spice containers * Flush-mounted utensil rack * Folding hooks * Oxygenics showerhead * Cordless roller blind (bathroom door) |
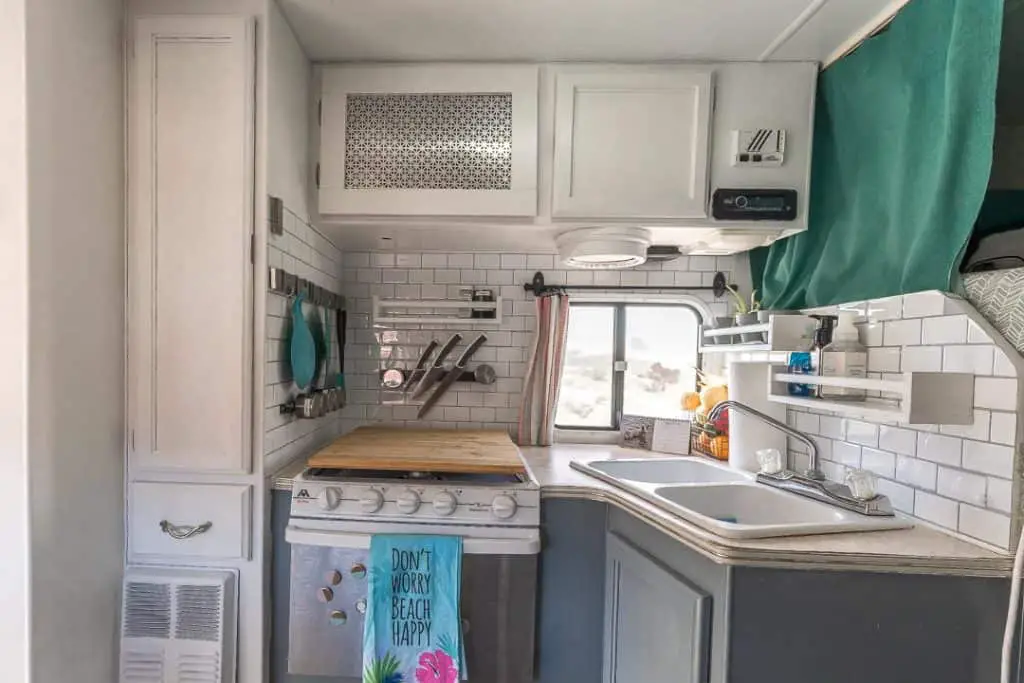
Kitchen Backsplash (Tic-Tac Tiles)
RVs are notorious for standard vinyl interior walls. Most are neutral colors and, because most people purchase RVs for limited use throughout the year, the quality and color of the walls is bland at best.
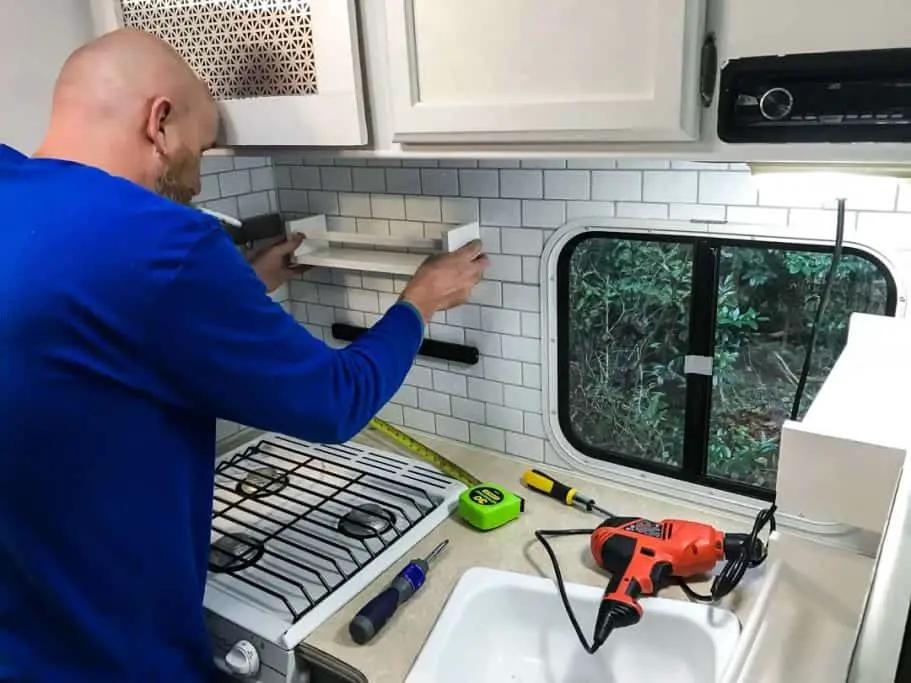
By adding a backsplash throughout the kitchen wall we are immediately able to liven up the entire living area. We recommend that you get these Tic Tac Tiles as they are common, affordable and easy way to add a backsplash to your RV kitchen.
The tiles come in a variety of patterns. Most are standardized to 12” x 12” squares which you can then cut to fit as necessary. If you are modifying your kitchen make sure this is the first thing you do.
That way if/when you mount things to the wall you will not have to cut around those items.
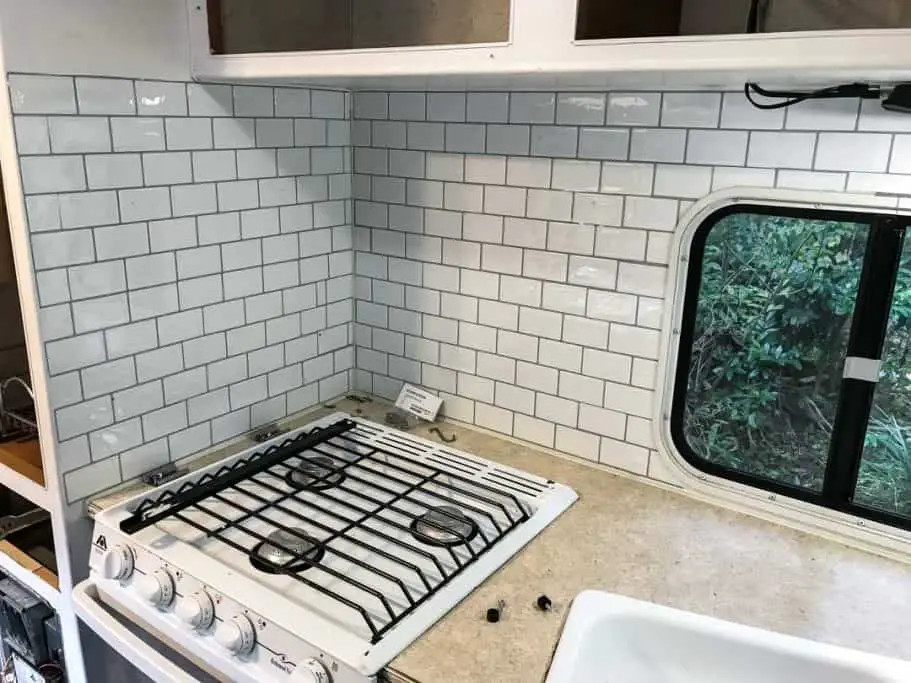
Cutting Board Stove Top
Without a doubt, one of the biggest space-wasters in our RV kitchen was our factory-issued stovetop.
Not only did it sit 3 inches above the stove, but it also was difficult for us to fold out of the way when we were cooking on the stovetop. Removing the stovetop cover was one of the first things we did when we decided to upgrade our RV kitchen.
We also removed the vent/fan above the stove because it too took up too much space. In fact, our fan did not work.
And as many things you figure out when living full time in your RV, we learned we could open a few windows and turn on our Fantastic Vent to achieve the same result.
While we gained around 6 inches from above the stove and another 3 from the stovetop itself it felt like we tore down a wall in the kitchen! We had so much more area in the kitchen which we could strategically fill with the items below that made our kitchen feel more like one we left behind.
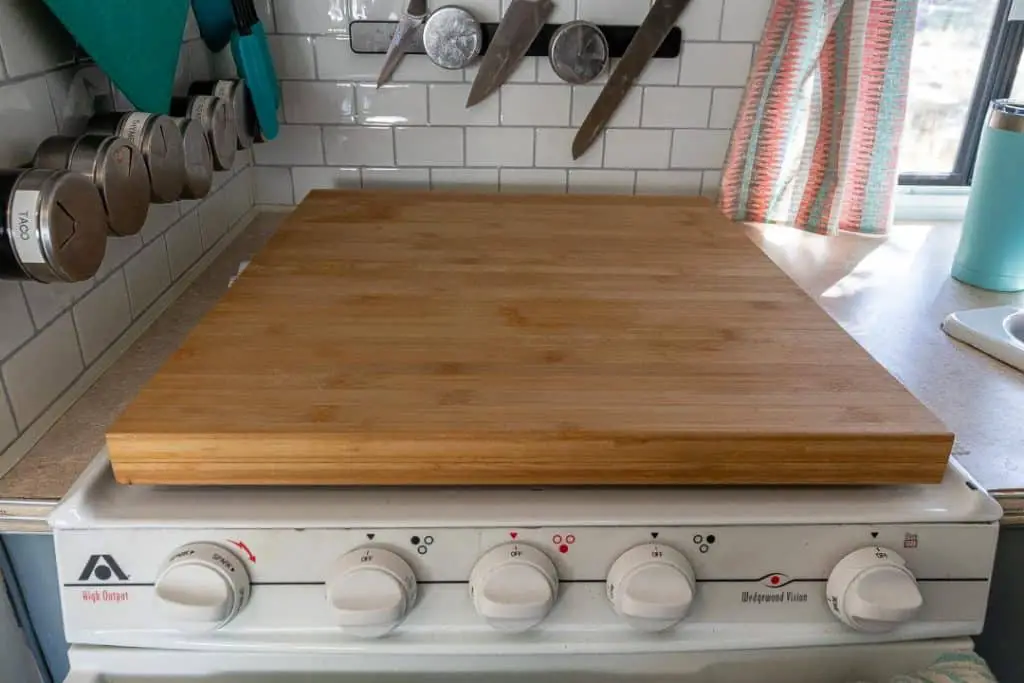
Ikea is known for creating incredibly affordable furniture solutions for tiny spaces and we were fortunate enough to have an Ikea nearby in which to shop.
Ikea was able to help us solve three needs by providing a bamboo cutting board:
- First, we had a great cutting board on which to prepare meals.
- Second, the cutting board worked as a great serving tray for when we wanted to move the meal outside.
- Lastly, the cutting board still covered the stove when the stove was not in use (in other words, it gave us another surface on which to stack stuff!).
Note: A bamboo cutting board will not remain in place on the metal stovetop when you are moving. (Yes, we learned this the hard way!). So you will need to put shelf lining on top of the stove prior to setting the cutting board over it.
Also, note that you should wait until the stove is cool before doing this!
Shelving for the Walls
RV storage is valuable. One of the best ways to help create more storage and to upgrade your RV is to utilize the wall and let it work for you. After we finished the Tic Tac Tile backsplash in the kitchen we assembled several basic Ikea shelves.
The Ikea shelving we purchased took 5 minutes to assemble. Before mounting them, we painted them white to create a warm, open sense in the kitchen.
If you don’t have an Ikea nearby, you can pick up shelving in most big-box hardware stores. We opted for several small storage shelves. But even if you can’t find one of your taste, try this one from Ikea.
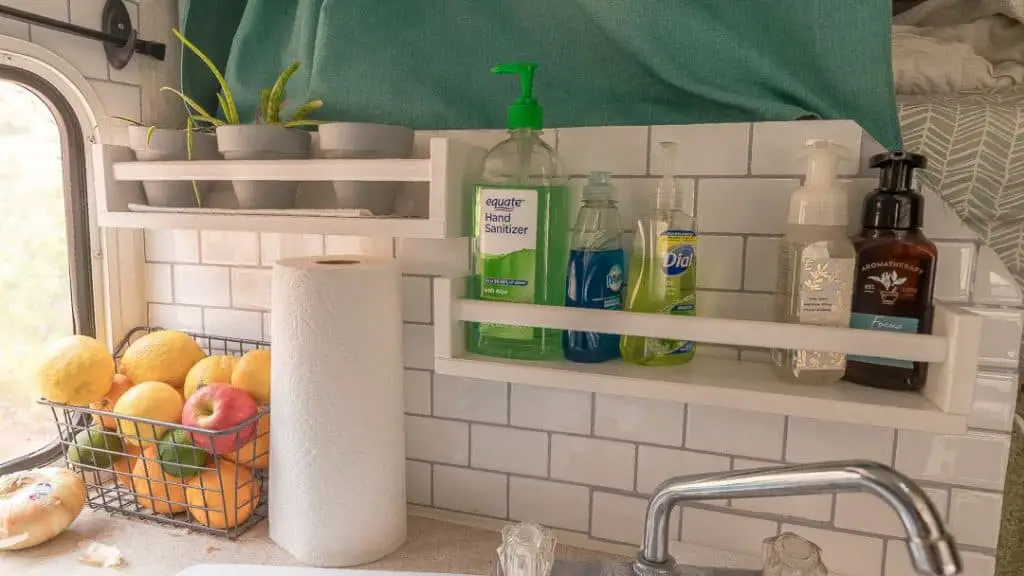
Note: Because we all know that everything in a camper moves it was important for us to have shelving that enclosed the front so that we could keep things in their place when we were on the move!
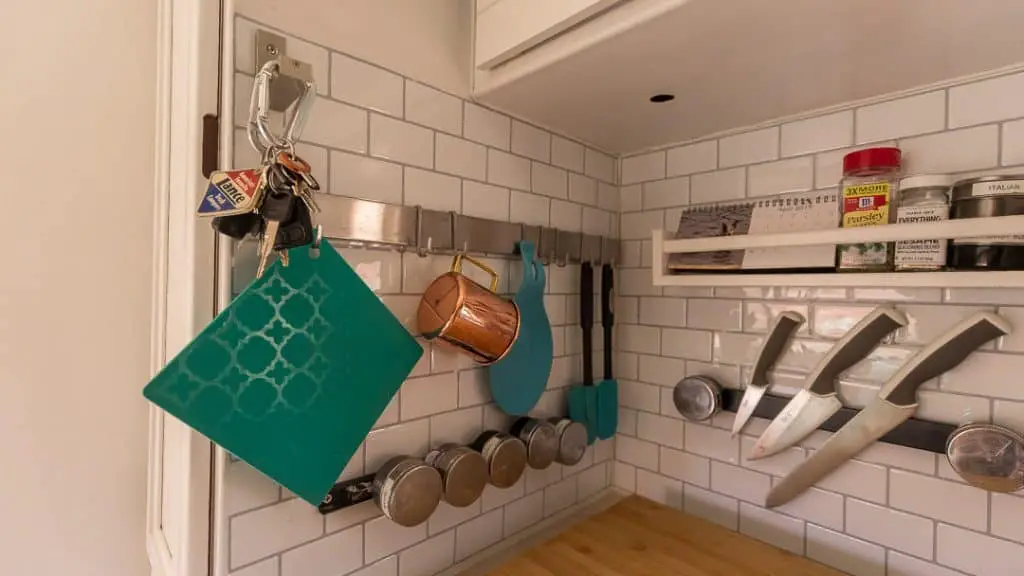
Magnetic Bar for Quick Grab
Upgrades for the RV kitchen don’t get much simpler than this! You can optimize wall-space again by adding one or two magnetic bars on which to mount metal objects.
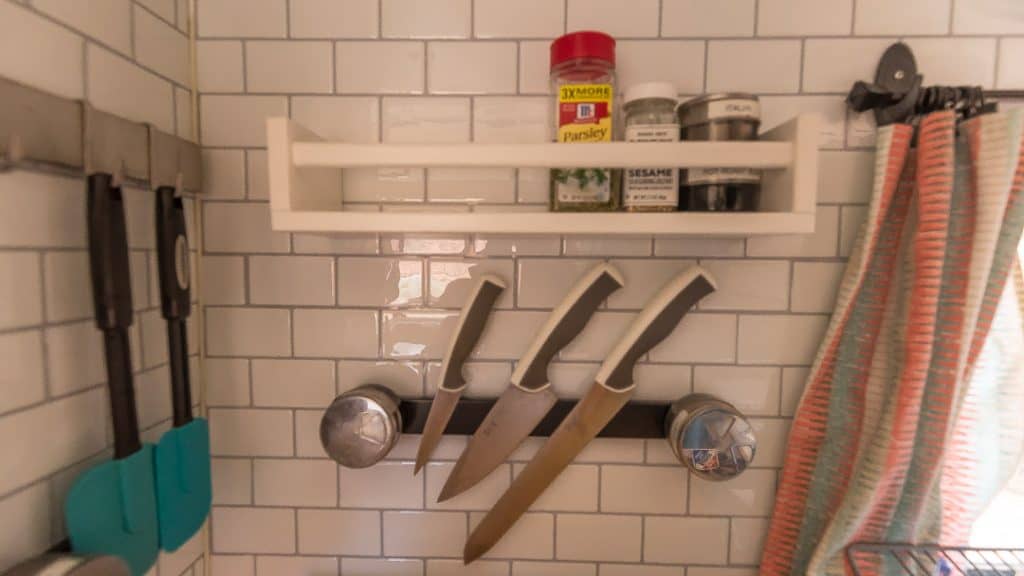
We have two stainless steel magnetic bars in our kitchen. One is for our knives and other cutlery. The other is for our magnetic spice containers.
By mounting our knives on the wall we save space in the drawer. Plus it is quick and easy to grab a knife from the wall when needed. Do make sure they are mounted securely so the whole bar doesn’t shake off the wall!
Spice Magnets
Although we live in a small RV, cooking meals continues to be a very important thing for us – particularly when it comes to our budget! We cook 5-6 days per week. So having a great selection of spices on hand is important.
However storing those spices, among the many other things to try and store in an RV, can be a challenge.
We advise that you get these stainless steel magnetic spice containers as they will help make cooking convenient and not take up cabinet storage.
The spice containers mount easily on our two magnetic racks. If you have other metallic surfaces, such as a refrigerator, you can even consider mounting yours there. While the containers are convenient, they are not necessarily large enough to hold an entire container of spice.
And since we choose to mix our own spices (taco seasoning is our favorite!), we still have lots of containers of spices floating around.
However because we do not need to access these containers often, we simply store them in our long term storage on our flatbed and grab them when we need to refill the magnetic spice containers.
Wall-Mounted Hanging Utensil Rack
Another great idea for maximizing your RV kitchen is a wall-mounted utensil rack.
Not only does it save more room in the drawer. But it will also help make cooking more convenient. This is not a new idea for most modern kitchens. But finding a functional utensil rack for your RV will take some thought.
After nearly a year with one we took from our old kitchen, we realized we needed to make an upgrade. Our former utensil rack was a bar that bent at the corners and left approximately two inches off the wall.
We thought this would be great as we could hang pretty much any kind of hook to it. We also thought we’d be able to latch things such as carabiners to create additional latching opportunities.
However, we quickly found that as we drive (particularly dirt or Alaskan roads) everything shifts around. Nearly every time we stopped we found half of our utensils and their corresponding hooks on the floor of our camper.
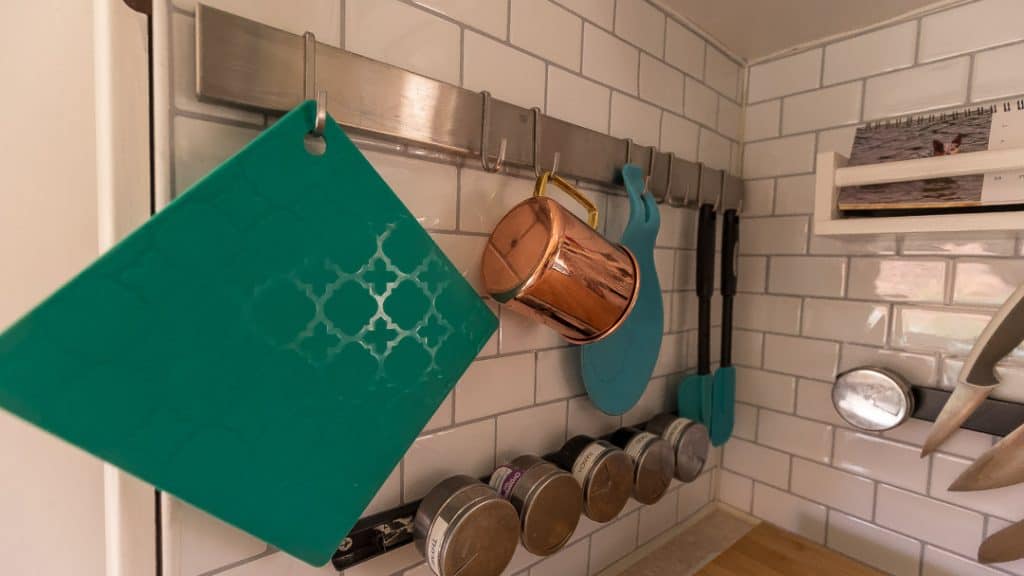
Additionally, the longer we went the more we found the rack itself was bouncing up and down and eventually working the screws right out of their mount in the plywood. At this point, we discovered a flush-mounted utensil rack that took all (most) of the shaking and sliding out of the way.
By restricting the movement of the utensils hanging from the wall we minimize both the amount of time we spend picking them up off the floor and the gradual damage to our kitchen wall.
Whether hanging kitchen utensils, keys, headlamps or anything else you might need to access relatively easily, these utensil racks are an RV kitchen modification!
Foldout Hooks for Storage
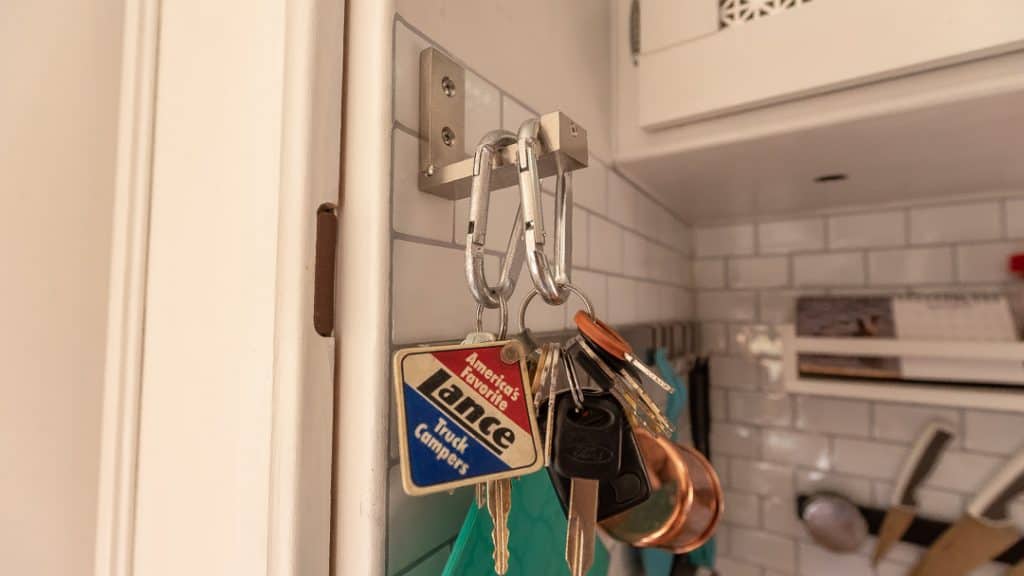
One of our favorite and simplest upgrades for our kitchen is the addition of folding hooks. Again we wanted to optimize on the wall in our kitchen.
So adding these hooks created an opportunity to add utility and functionality to a part of the camper that would otherwise be void. Ikea provided us with the best option yet again.
The hooks fold-out just over 3 inches off the wall. This is minimal and keeps them from reaching too far out into the kitchen! Plus it is just enough for us to be able to hang a few sets of keys and headlamps.
We also keep a foldout hook by our door to be able to hang hats and a flashlight for quick access.
READ NEXT: Check out our post on all the top RV kitchen accessories you must have in your camper!
RV Upgrades For The Bathroom
RV bathrooms are pretty straightforward. As such, there is little room for improvement.
Actually, there is little room at all! (That’s an RV joke, in case you’ve never found yourself crammed inside a tiny camper bathroom!)But we found that several upgrades in our bathroom have made all of the difference both in the functionality of the bathroom as well as in making our camper feel more comfortable.
Shower Head for Water Efficiency
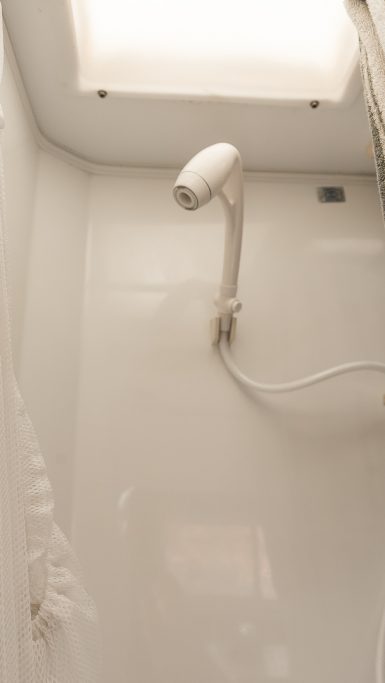
Water is a precious commodity, especially when dry camping and boondocking. In fact in our camper, where we have 300 watts of solar power and 4500 watts in generators, freshwater is our limiting factor.
As such we wanted to be sure that we did not waste any freshwater. The standard showerhead in our Lance 845 camper was not very efficient.
You had to turn either/or/both the cold and hot water knobs on the sink and then use the water as it came out of the showerhead. Since military showers are a must (rinse, lather, wash, repeat), being able to quickly turn the water on and off was important to conserving water.
Our factory-installed camper wasted a lot of water because you had to turn the knobs each time you wanted the water on or off. And easy upgrade to this wasteful shower head is the new Oxygenics showerhead that has a button that you click to turn the flow of water on or off.
So whether you choose to military shower or take your time, the showerhead is quick and easy to use and will save your most precious commodity!
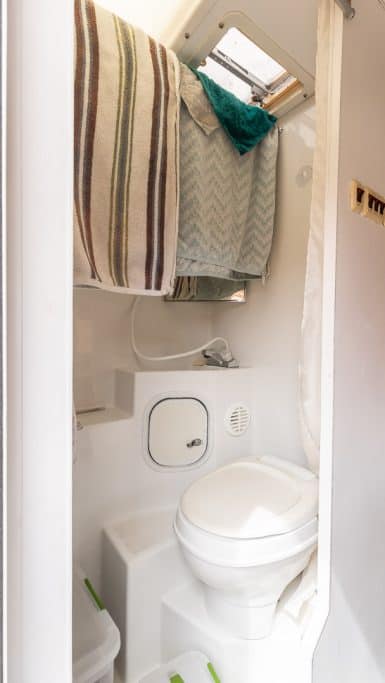
Hanging Towel Bar/Rod for Storage
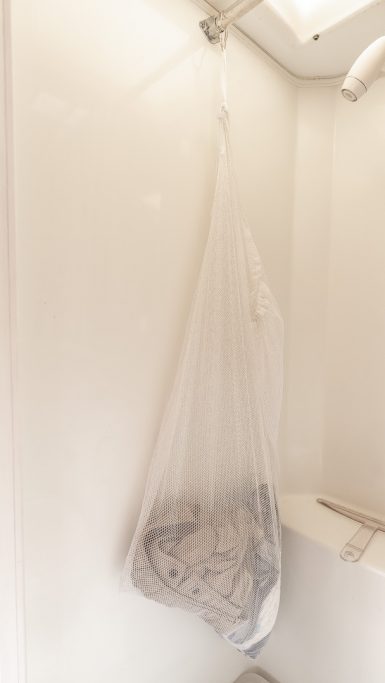
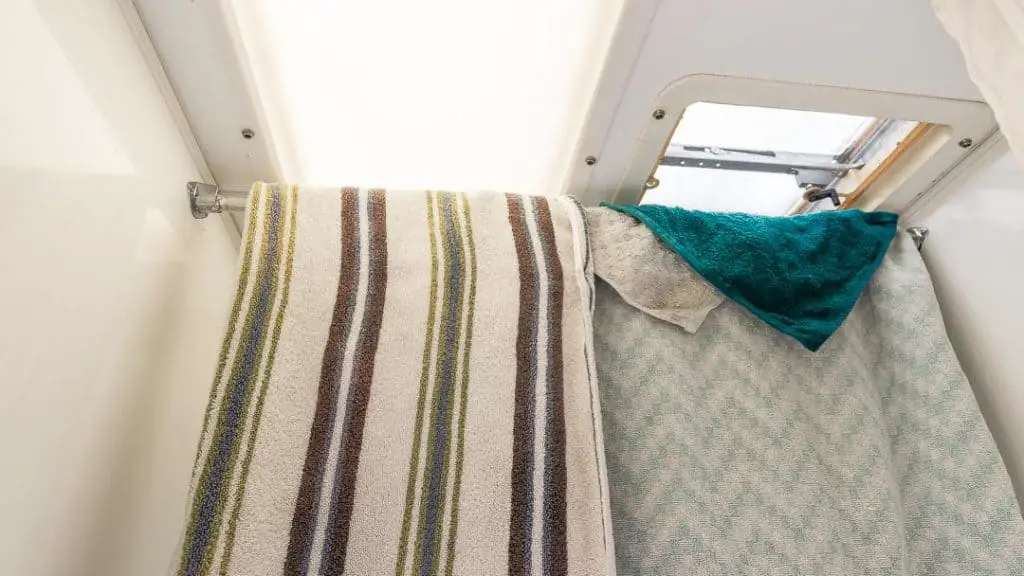
Some campers will include a hanging rod by factory standards. Many won’t.
If you’re looking for a simple way to add options to your camper storage conundrum then this is sure to maximize a part of the RV that typically receives little use. We prefer our rod in our bathroom because it allows us to use the space to store things we need to get out of the way, yet remain accessible.
And because we don’t crowd the bathroom we are still able to use it for what it was intended!By hanging a few coats, our dirty laundry bag and a shoe rack we are able to push these things out of the way when we need to use the toilet.
And when it comes time to shower we can grab the items and move them with relative ease. It seems too basic of a concept. But it works great for increasing our storage while not infringing on our daily lives.
Roller Blind Door
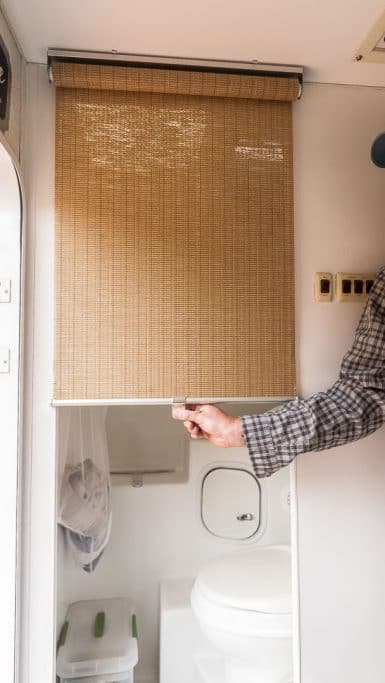
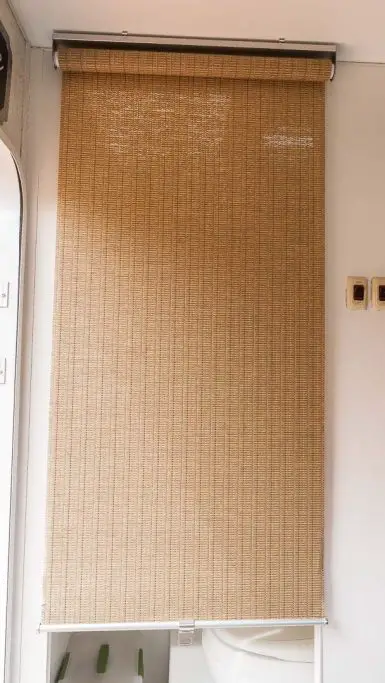
Our factory-installed camper bathroom was a traditional hinged door.
This meant that every time one of us wanted to use the restroom or shower we would either have to cram ourselves into the tiny compartment or we would leave the door open to some degree.
An open door meant that there was even less for the other one of us when the bathroom was in use. Additionally, the weight and size of the door was more cumbersome than helpful.
Another great upgrade was to remove our bathroom door and replace it with a lightweight cordless roller blind. The blind takes up a fraction of the door and it functions in exactly the same way. When we wanted privacy or to quarantine off the bathroom (in the event of having guests) we simply roll the blind down.
Most of the time the blind is up, however, which opens up our living area to have a more spacious feeling to it.
The Bottom Line About RV Modifications
Not all RVs are created equal. And regardless of how much you shop around or custom-build a new RV, there are always going to be things that you can change.
If you are like us, living out of your RV full time, then the longer you spend in your RV the more you see how subtle changes can have a big impact on your quality of life.
RV kitchen upgrades are affordable and relatively easy to do. Adding color, storage and organization to your RV kitchen can give it a more relaxing feeling.
Bathroom upgrades, though fewer, can also add a level of functionality and appearance that also brings out that home-away-from-home feeling. These are especially important if you plan to live off your solar power and spend much of your time dry camping.
Whether you live full time in your RV or only take it out in limited occasions, there are always small things that you can do to make your RV feel more comfortable!
Have an RV kitchen or bathroom upgrade or tip we didn’t mention? Let us know so we can give it a try!
Comments are closed.